Homemade salsa is one of those things that may seem intimidating but is really quite simple. I made this salsa to accompany a Spicy Shrimp Pretzel Roll sandwich but you can use it for almost anything. The base principles behind it can be adapted in countless ways and is a great example of one of my core philosophies of home cooking. Mango is in season right now so it’s cheap and extra delicious. The sweetness adds a nice contrast to spice and heat.
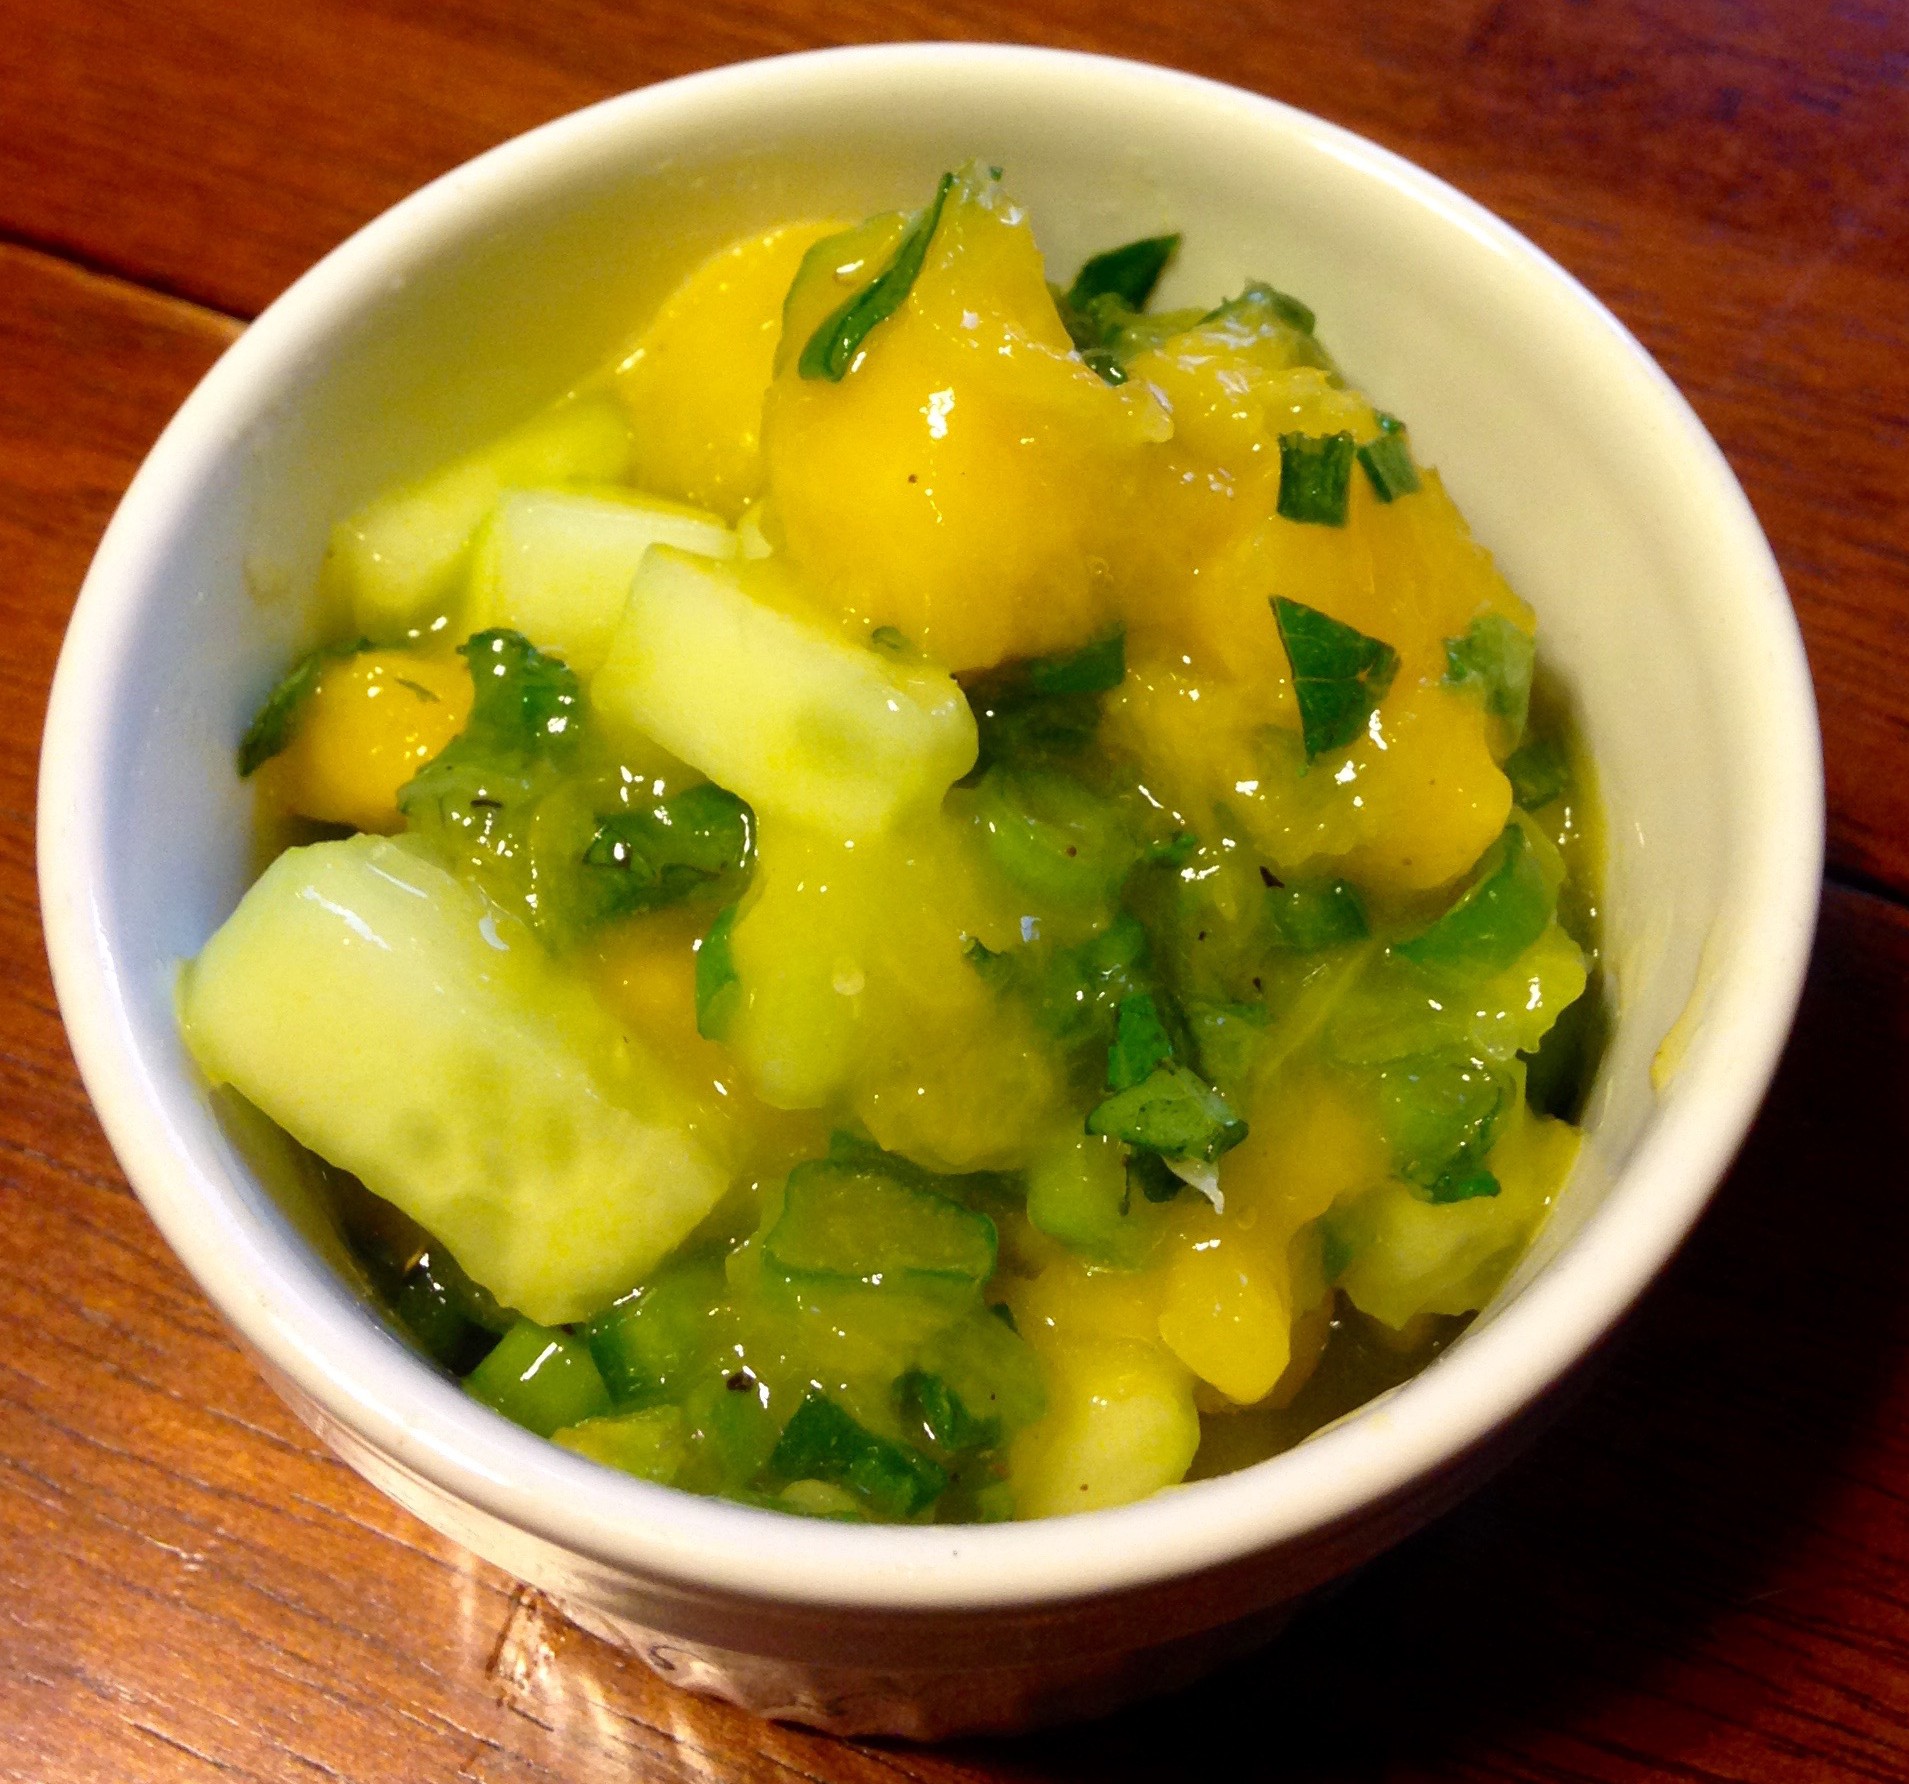
Minty Mango Salsa
4-6 servings. Takes 10-20 minutes
1 Mango
1/2 cucumber
1 bunch green onions
1 handful of fresh mint leaves
1 fresh jalapeno
2 limes
salt
pepper
olive oil
Start by breaking down your ripe mango. Here’s a great video tutorial if you don’t get a lot of practice. They can be kind of tricky, especially if you don’t get your first cut right.
Chop up your cucumber into similar sized chunks as your mango. Ribbon the green onions, about half of the bunch. Do the same with the mint leaves.
Use as much jalapeno as you desire. The fresh ones can vary in heat and everyone has a different tolerance. The more seeds you put in the more spice there will be.
Combine everything in a large bowl. Squeeze the juice of both limes over the mix and add a dash of oil. Two big pinches of sea salt and a few cranks on a pepper mill.
Stir it up. If you want to get fancy you can toss it in a blender and pulse it a few times.
Before you serve, have a taste or two. You’re trying to balance the water content of the cucumber with lime and salt, so if it’s a little bland or watery add a little of each until you can taste mango, acid and salt equally.
The turkey burger. The humble cousin of the American classic beef burger. The dry, crumbly, healthier version of a legend. To me, turkey burgers and sweet potato fries represent a bridge from the American cuisine I grew up with to the health oriented, gourmet style scene that American food is becoming. There was a time when offering a turkey burger and sweet potato fries was akin to shining a Bat Signal in the sky to people who had any interest in eating healthy. Throw in a few house made soups and an espresso machine and you had yourself a healthy cafe. The turkey burger was a symbol of all that.
Back then when you “ate healthy” you accepted that the food you ate wasn’t going to be that good. Dried out turkey patties, vegetarian options loaded with pasta and cheese… good, healthy restaurant food takes a certain finesse and passion that most places didn’t place a premium on. As their customers changed, many restaurants did with them, and thankfully now we can get some options that make us feel better about our waistline (and the planet) all over the country.
Except we’re at home and we can eat as deliciously healthy as we choose. So skip the sleeve of frozen turkey pucks and make your own.
Serves 4 – Takes 30 minutes
One pound of ground dark turkey meat. White meat is acceptable but dark is better. More flavor.
One bunch of scallions
One knuckle of fresh ginger (powdered if you have to but the fresh stuff is best)
Soy Sauce
Worcestershire Sauce
Olive oil
Sea or Kosher Salt
Cracked black pepper
Put the meat in a mixing bowl. Three dashes of soy, three dashes of worcestershire sauce. One dash of olive oil. Two pinches of good salt and several grinds of black pepper.Take a piece of ginger half the size of a man’s thumb and grate it with a zester or the fine side of a cheese grater until it’s almost gone.
Mix it up with your hands. Use a glove if you want.
Then, take a quarter of the meat and place on a piece of foil or plastic wrap. Use another piece to squish the patty thin and flat. This helps it cook quickly and get more grill flavor per bite. I leave them between the sheets until it’s time to get them on the grill / in the pan. Repeat until you have 4 patties per pound.
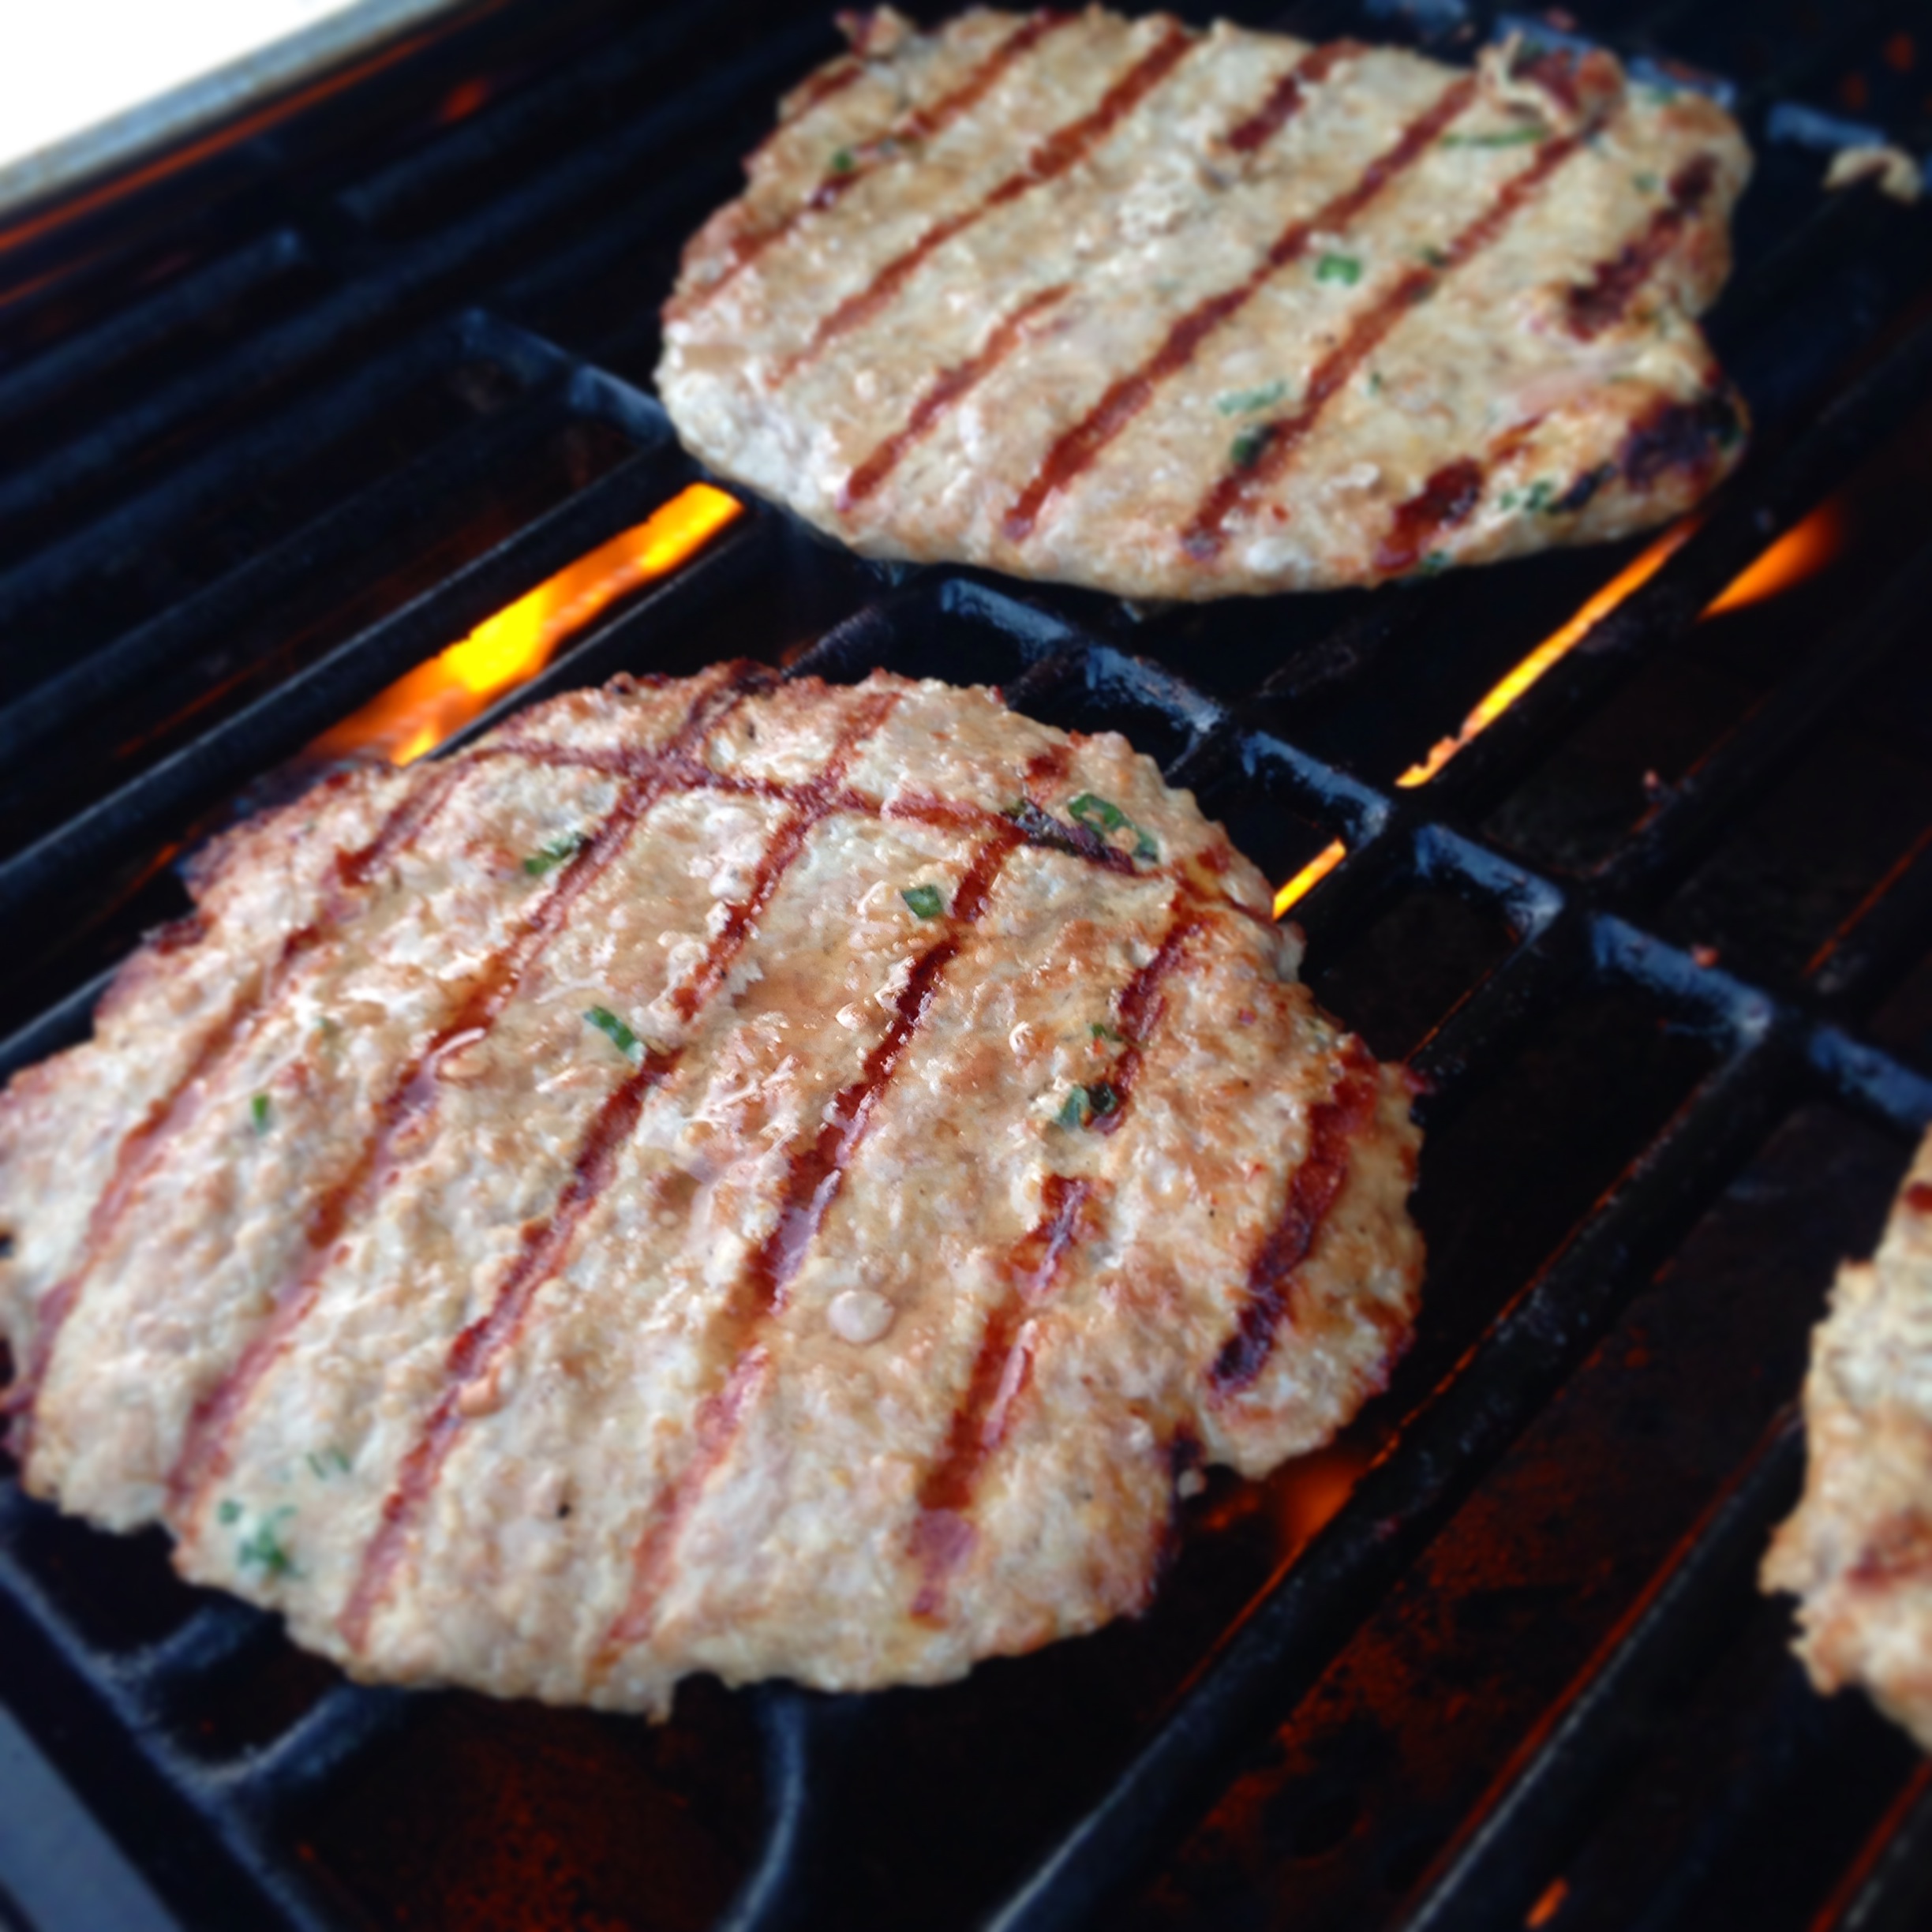
Grill is better, almost always. Stove top is fine too. If you’re in a pan heat up some oil before you place the patty in. If on a grill, turn the thing on high and close the lid for awhile. Let it get real hot. Charcoal? Be a grill master. Enjoy the day.
Once your cooking surface is white hot, place your burgers on. Do not squish the burger. Do not flip the burger. Do not touch the burger. If you’re at a party with a lot of guys who want to contribute to the grilling, appoint one of them to be sergeant at arms and tackle anyone who tries to touch the patties.
Let the patty cook until some moisture starts to pool on the uncooked side. 4-5 minutes. Flip over. Give it another couple minutes,
Want cheese on it? Cheese and Asian flavors don’t have a long and fruitful history but why not. Place room temp cheese on the patty as soon as you flip it. Close the lid to the grill or place a piece of foil over the pan to help melt it fast. Don’t overcook the meat to melt the cheese.
Serve over bread or wrapped in a big leaf of lettuce to your adoring masses
There is no greater link to my past than preparing festive food on a budget. This kind of cooking is in my bones. Generations of Lithuanians and French Canadians speak through me as I stir and chop and taste. I connect with the ghosts of family past in my kitchen with flavors and scents. I can feel my grandfather in the room, his colloquialisms echoing in my brain. If not just for one day our holiday feasts cut through the extra noise of this modern life. We return to a time when food was our only form of entertainment at home. Sure we steal glances at our phones, but only occasionally and then feel bad about it afterwards. Instead we talk to each other, we listen to one another… and most importantly, we eat.
I was struck by inspiration for this years Easter dinner by one wayward glance at the butcher counter more than two weeks ago. The sight of short ribs got my gears turning. What a perfect holiday meal to serve our guests… It hits all the marks… Easy, delicious, cheap. Once you get it in the oven your work is basically finished… Short ribs it had to be.
Let’s get to it.
Serves 4-6 Approximately 3 hours
3 pounds of bone in short rib (boneless is fine too. Costs more but just as good)
3 carrots
3 celery stalks
3 cloves of garlic
1 large onion
4 cups of beef broth (usually one large box)
1 bunch of scallions or chives
1 bottle of red wine
1 small bundle of fresh thyme
1 sprig of fresh rosemary
2 bay leaves
all purpose flour
salt and pepper
A dutch oven or oven safe pot
Pep Talk
Something to remember before you start. This is going to seem like a lot of steps for a fancy meal. Don’t get nervous about it. This is easy. It is really hard to screw up. Even if you skip all these steps and just throw everything in the pot in the oven you will end up with a delicious meal. Remember, this is essentially European peasant food. Cheap cuts of meat, a pot full of vegetables and a bottle of local red wine cooked over fires or baked until it falls off the bone. This entire dish can be done a day ahead, some say it’s even better that way. It’s an ideal meal for entertaining.
Preparation
First step, salt and pepper the short ribs. Then toss them in a large bag with flour and shake them up until they all have a nice even coating.
Set them aside and chop up your onion, celery, carrots and garlic. Turn your oven on 350 (175c).
Pour some oil in your dutch oven and put the heat on medium. You want enough oil to coat the bottom of the pot. Let the oil heat up and place the ribs in one at a time until you have single layer. With 3 pounds this will likely take two batches. Sear the ribs until they’re browned up nicely. 4 minutes or so on each side. Set them aside for later and spoon out most of the oil. Scrape the crusty bits with a wooden spoon and add your onions to the pot. Once they are starting to brown and melt down add your carrots and celery. Stir them up and salt and pepper everything. Add two of the chopped garlic cloves now.
Starting to smell good huh?
Let the mixture cook for 5-10 minutes, stirring often.
Place the seared short ribs on top of the veggies. At this point it doesn’t matter if they’re all arranged perfectly or not, just get them in the pot.
Open that bottle of red. Buy a wine that’s drinkable but don’t spend too much money on it. A table red or a cabernet works great here. Pour yourself a half a glass and dump the rest of the bottle in the pot. Turn the heat up to medium high and make a note of how high up on the pot the liquid is. Keep the lid off of the pot.
Wait for a boil. You’ve got about 20 minutes here and only need to stir a few times. Wash up the cutting board and dishes, get your counters clean.
You want to boil it until the amount of red wine has reduced by half. I tied up a bundle of the thyme and a sprig of rosemary with cooking string and tossed it in with two bay leafs and the third chopped garlic clove. Toss in a couple pinches of flour and pour in the (4 cups) entire box of beef broth.
Cover.Place in oven.
“Siri, set a timer for 2 hours please”
Plenty to do for that time. Set out your appetizers, greet your guests, work on your side dish for the short ribs. (mashed potatoes, polenta, roasted vegetables, risotto, pasta come to mind) I made a parmesan risotto to accompany mine. It came out pretty good but not good enough for me to tell you how to make it. Maybe next time.
When the two hours is up take a look at your masterpiece.
I pulled out the bones with a pair of tongs and tossed them. Using the tongs, break up the meat until it’s shredded. If the bones don’t come out easily and the meat doesn’t shred with a light touch give it some more time. Stir up the mixture and have a spoonful. Add salt and fresh cracked black pepper to taste and put back in the oven for 30 minutes. This is when I made my (decent) risotto.
When finished, serve your amazing short ribs over your amazing side dish. Top with chopped green onion or chives. Pray for leftovers.
Oh Minestrone… How I love thee. It, like so many food memories, takes me back to childhood, to memories that are so old and faded that they’re best described by colors. A whiff of a maturing minestrone soup on the stovetop will transport me to a time when chairs were something I had to climb to sit on. It’s bright and savory, steeped in herbs and hearty with cannellini beans and pasta.
I spent a few days last week working with a fellow food lover. We spent hours talking about this spot and that, our favorite dishes and preparations. We swapped tips and techniques and sat down to two exceptional working lunches. At one point minestrone came up (he uses swiss chard, brilliant) and it got it stuck in my craw, the craving sat in the top of my stomach from the moment it was breached. By hour 40 I had broken. It had to be done.
Minestrone Soup
Serves 6-8 45-60 minutes
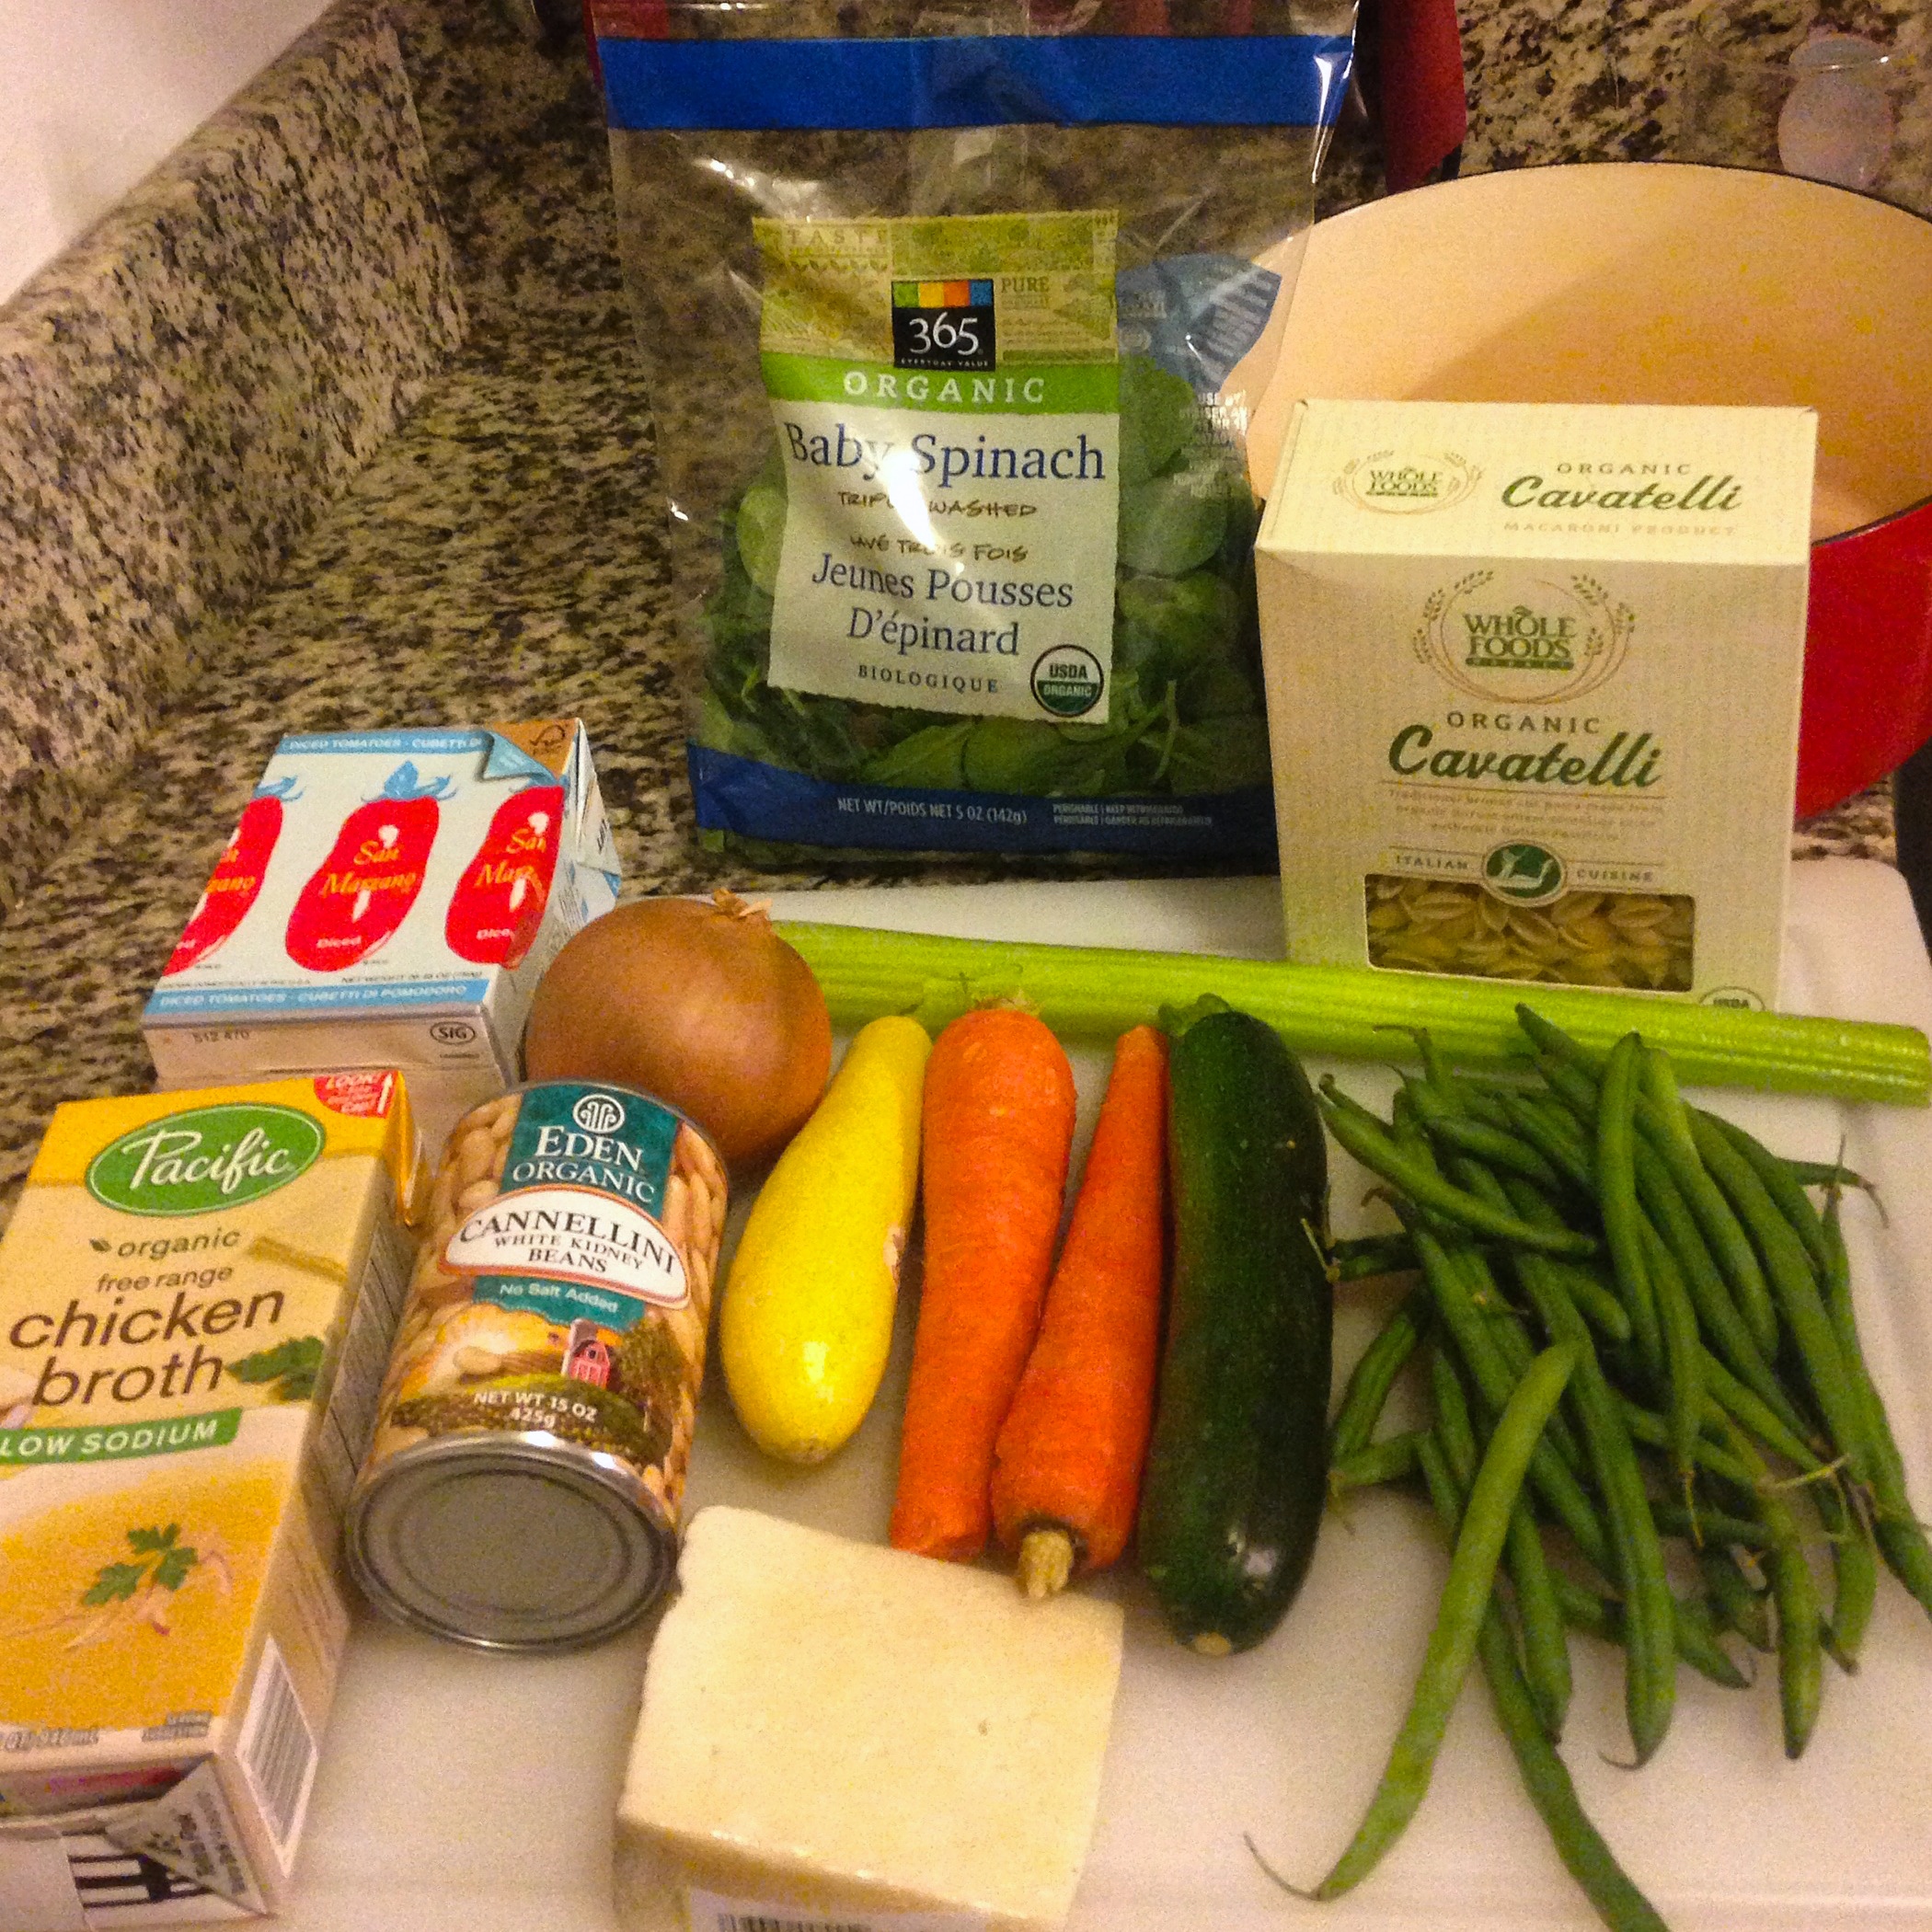
Ingredients
1 clove of garlic
2 carrots
1 celery stalk
1 medium yellow onion
1 small yellow summer squash
1 small zucchini squash
1 large can of crushed tomatoes
1 can of cannellini beans
6 cups of chicken/ vegetable broth
2-4 cups of uncooked baby spinach
A handful of fresh green beans
1/2 cup of a small pasta shells
A hard italian cheese… Parmesan, Romano… (or, if you’re feeling classy, Pecorino)
1 Baguette
Dried herbs
Marjoram (oregano works too)
Thyme
Sage
Basil
2 Bay Leaves
Sea salt
Cracked black pepper
Preparation
Get everything out and organized. Set up a slop bowl for peels and ends, it keeps you from running back and forth to the trash.
Splash some olive in a pot on medium, break down your onions, carrots and celery into small bits. Salt & pepper, 2 layers of thyme, 1 layer of marjoram(or oregano) and a dash or two of basil and sage. Stir the mix and put the burner on medium high.
Get to work on those green beans. I’ve never really figured out a perfect method with beans. I just snap off the stalk end with my fingers and work my way through the pile. Snap, next. Snap, next… Then I try to bundle them all like matchsticks and cut them into 1 inch pieces.
Slice the garlic, toss it in.
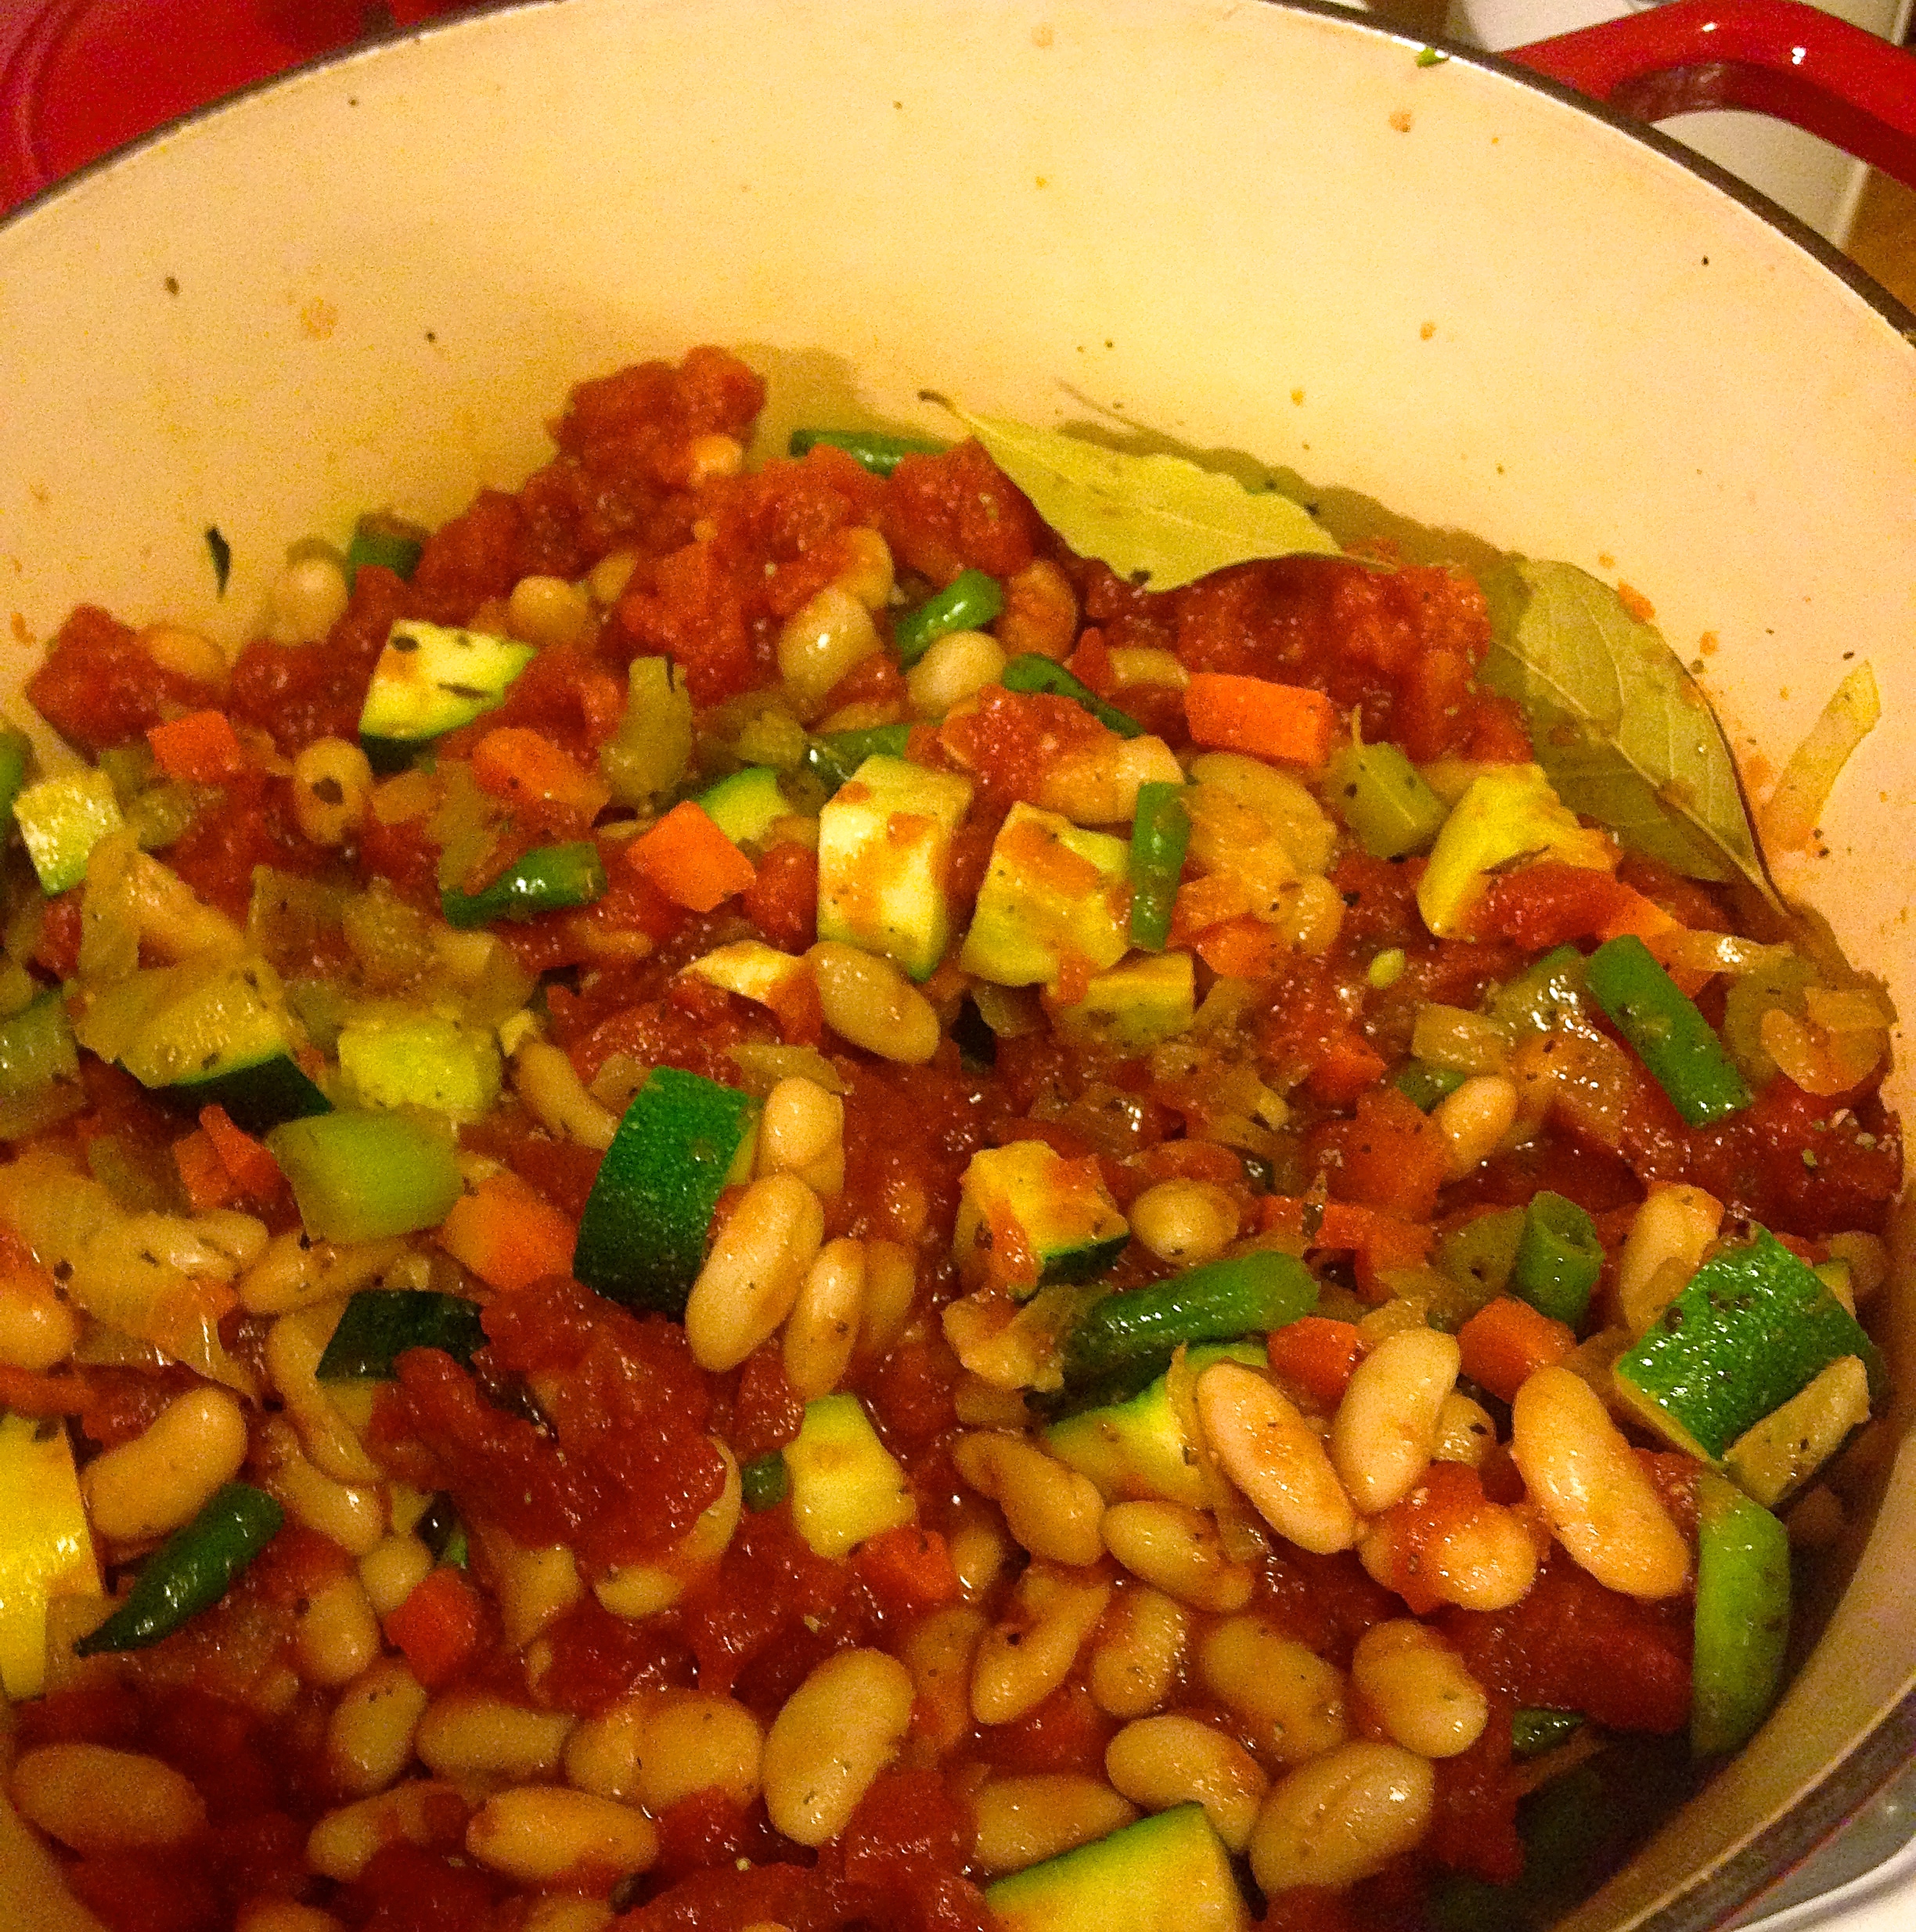
Quarter your zucchini and summer squash and chop it down. Into the pot it goes. More salt and pepper. Stir.
Add the tomato. Rinse the beans good if they’re out of a can and put them in. Salt, pepper, another coating of herbs. Bay leaves. Stir.
Note the order I did that in. Onions first, almost always. Everything else goes in order of vegetable firmness. Garlic usually in the middle, you don’t want it to burn and get bitter.
Mama Mia!
Give this a few minutes. Absentminded? OCD? Set a timer for 4 minutes and twenty three seconds.
Pour in your 6 cups of broth and stir. Turn heat to high and cover.
Do you have any old Parmesan rinds kicking around? Got a great tip this week, save your rinds in the freezer. Pull them out for jobs like this. I happen to have one in the fridge. Toss that in the soup.
Bring to a boil. This is where I clean up my mess. A clean kitchen is a happy cook! Working quickly I had enough time to clean up all the dishes I had just used and wipe down the counters.
Once the soup is boiling give it another stir and turn the heat down to medium high. At this point you can do it a few different ways. If it’s the weekend and you feel like torturing your friends and family, turn down the heat and take your time. Let the smell whip the guests into a frenzy. (A trick I learned from my mother) They’ll be knocking each other over by the time you’re ready to serve. If you’re in a hurry like me, keep whipping that soup into a boil. Ze flavors must marinate! Ze broth must reduce! Work soup work!
A boiling soup is a reducing and thickening broth. You need some of that to concentrate the flavors but you don’t want it too thick. I like my soups with a lot of broth so I keep the cover on for most of the cook, pulling the lid off at the end for a mad dash 5 minute reduction. It’s a balance. You can always thicken more with uncovered heat. Thinning the broth is a little more complex and I try to avoid it.
Boil some water for your pasta and get that going. Follow the instructions on the box for timing. Drain the water and set your pasta aside.
Why do this? Extra steps and extra dishes? Not usually our style here in the mancookgood kitchen.
I do it because I don’t want to leave the pasta in the soup for leftovers. Same goes with rice. It continues to absorb the liquid and by day two or three my beautiful broth is a solid block of bloated pasta. It’s like a parasite sent to drink up all that goodness. Like Uncle Jack, it never stops drinking.Not today Mr. Cavatelli. Not today.
By this point your soup should be beginning it’s descent into flavorland. Drinking a glass of wine? Red? I was. Splash some in at any point.
Slice your bread and get it ready. (Toasted? I did) I like to put it in the toaster oven pre buttered. It makes for a soft interior and crispy edges. Who doesn’t like crispy edges? Bring them to me.
Add the spinach. Yes, all of it. It reduces, trust me. Stir it in as it shrinks.
Taste the soup. It should almost be there. Check the carrots, make sure they’re soft. Turn up the heat and take off the lid. Please put your tray tables up and in an upright position, the pilot has turned on the fasten seat belt sign. 5 more minutes of an uncovered boil, taste it again. Hot!
Here’s the most important part.
Spoon the soup and some cooked pasta into a bowl and grate your cheese over it. This is nearly non negotiable. Lactose intolerant? How bad? Grate the cheese and take a pill or something.
Sprinkle some chili flakes and a spot of pesto if you have it hanging around. Serve with the bread and a smile. Make the soup. Win the day.
My mother is an exceptional cook. She grew up in a time and a city where families of European immigrants lived clustered together in neighborhoods named after their homelands. It became my stomach’s good fortune that “French Hill” happened to border “Italian Hill”. While the children were off to school and the men off to work, generations of women would cook their family recipes throughout the day in anticipation of their families return. It was the smells of the neighborhood that got my mother most hooked on food. She spent days with other peoples’ grandmothers learning the foods they had learned from generations past.
I didn’t spend much time in the kitchen with my mother growing up, I was too busy taking the fresh and delicious food we ate for granted to do that. It wasn’t until I had grown and moved out that my enthusiasm for food began to take shape. I did, however, learn through osmosis what amounts to a master class in food and family theory that continues to this day. Her excitement about other culture’s foods really stuck with me. I can’t eat or smell something for long without dissecting the flavors and learning to make some version of it. Like many staples in my family’s home, my inspiration for yesterday’s meal began in my neighbor’s kitchen. One whiff of their grill on my way out the door and I knew Mexican would be on the menu. While I won’t pretend to know an Abuela’s version of carne asada I’d like to think she’d enjoy it if she had some. You’re always welcome Abuela!
I’m almost to the point.
So yesterday we had the conference championship games for American football. These days have become informal holidays in the States, the bigger the game, the bigger the group. Friends and casual fans come out of the woodwork while we light our fires, cook our meats and yell at men dressed in stripes. Depending on your rooting interests, they can be the best and the worst days but there is always food to keep us busy.
Yesterday while the Green Bay Packers cruelly teased their fans with early dominance, I was buzzing around a friend’s kitchen preparing some Carne Asada.
What’s that? Don’t live 100 miles from the Mexican border?
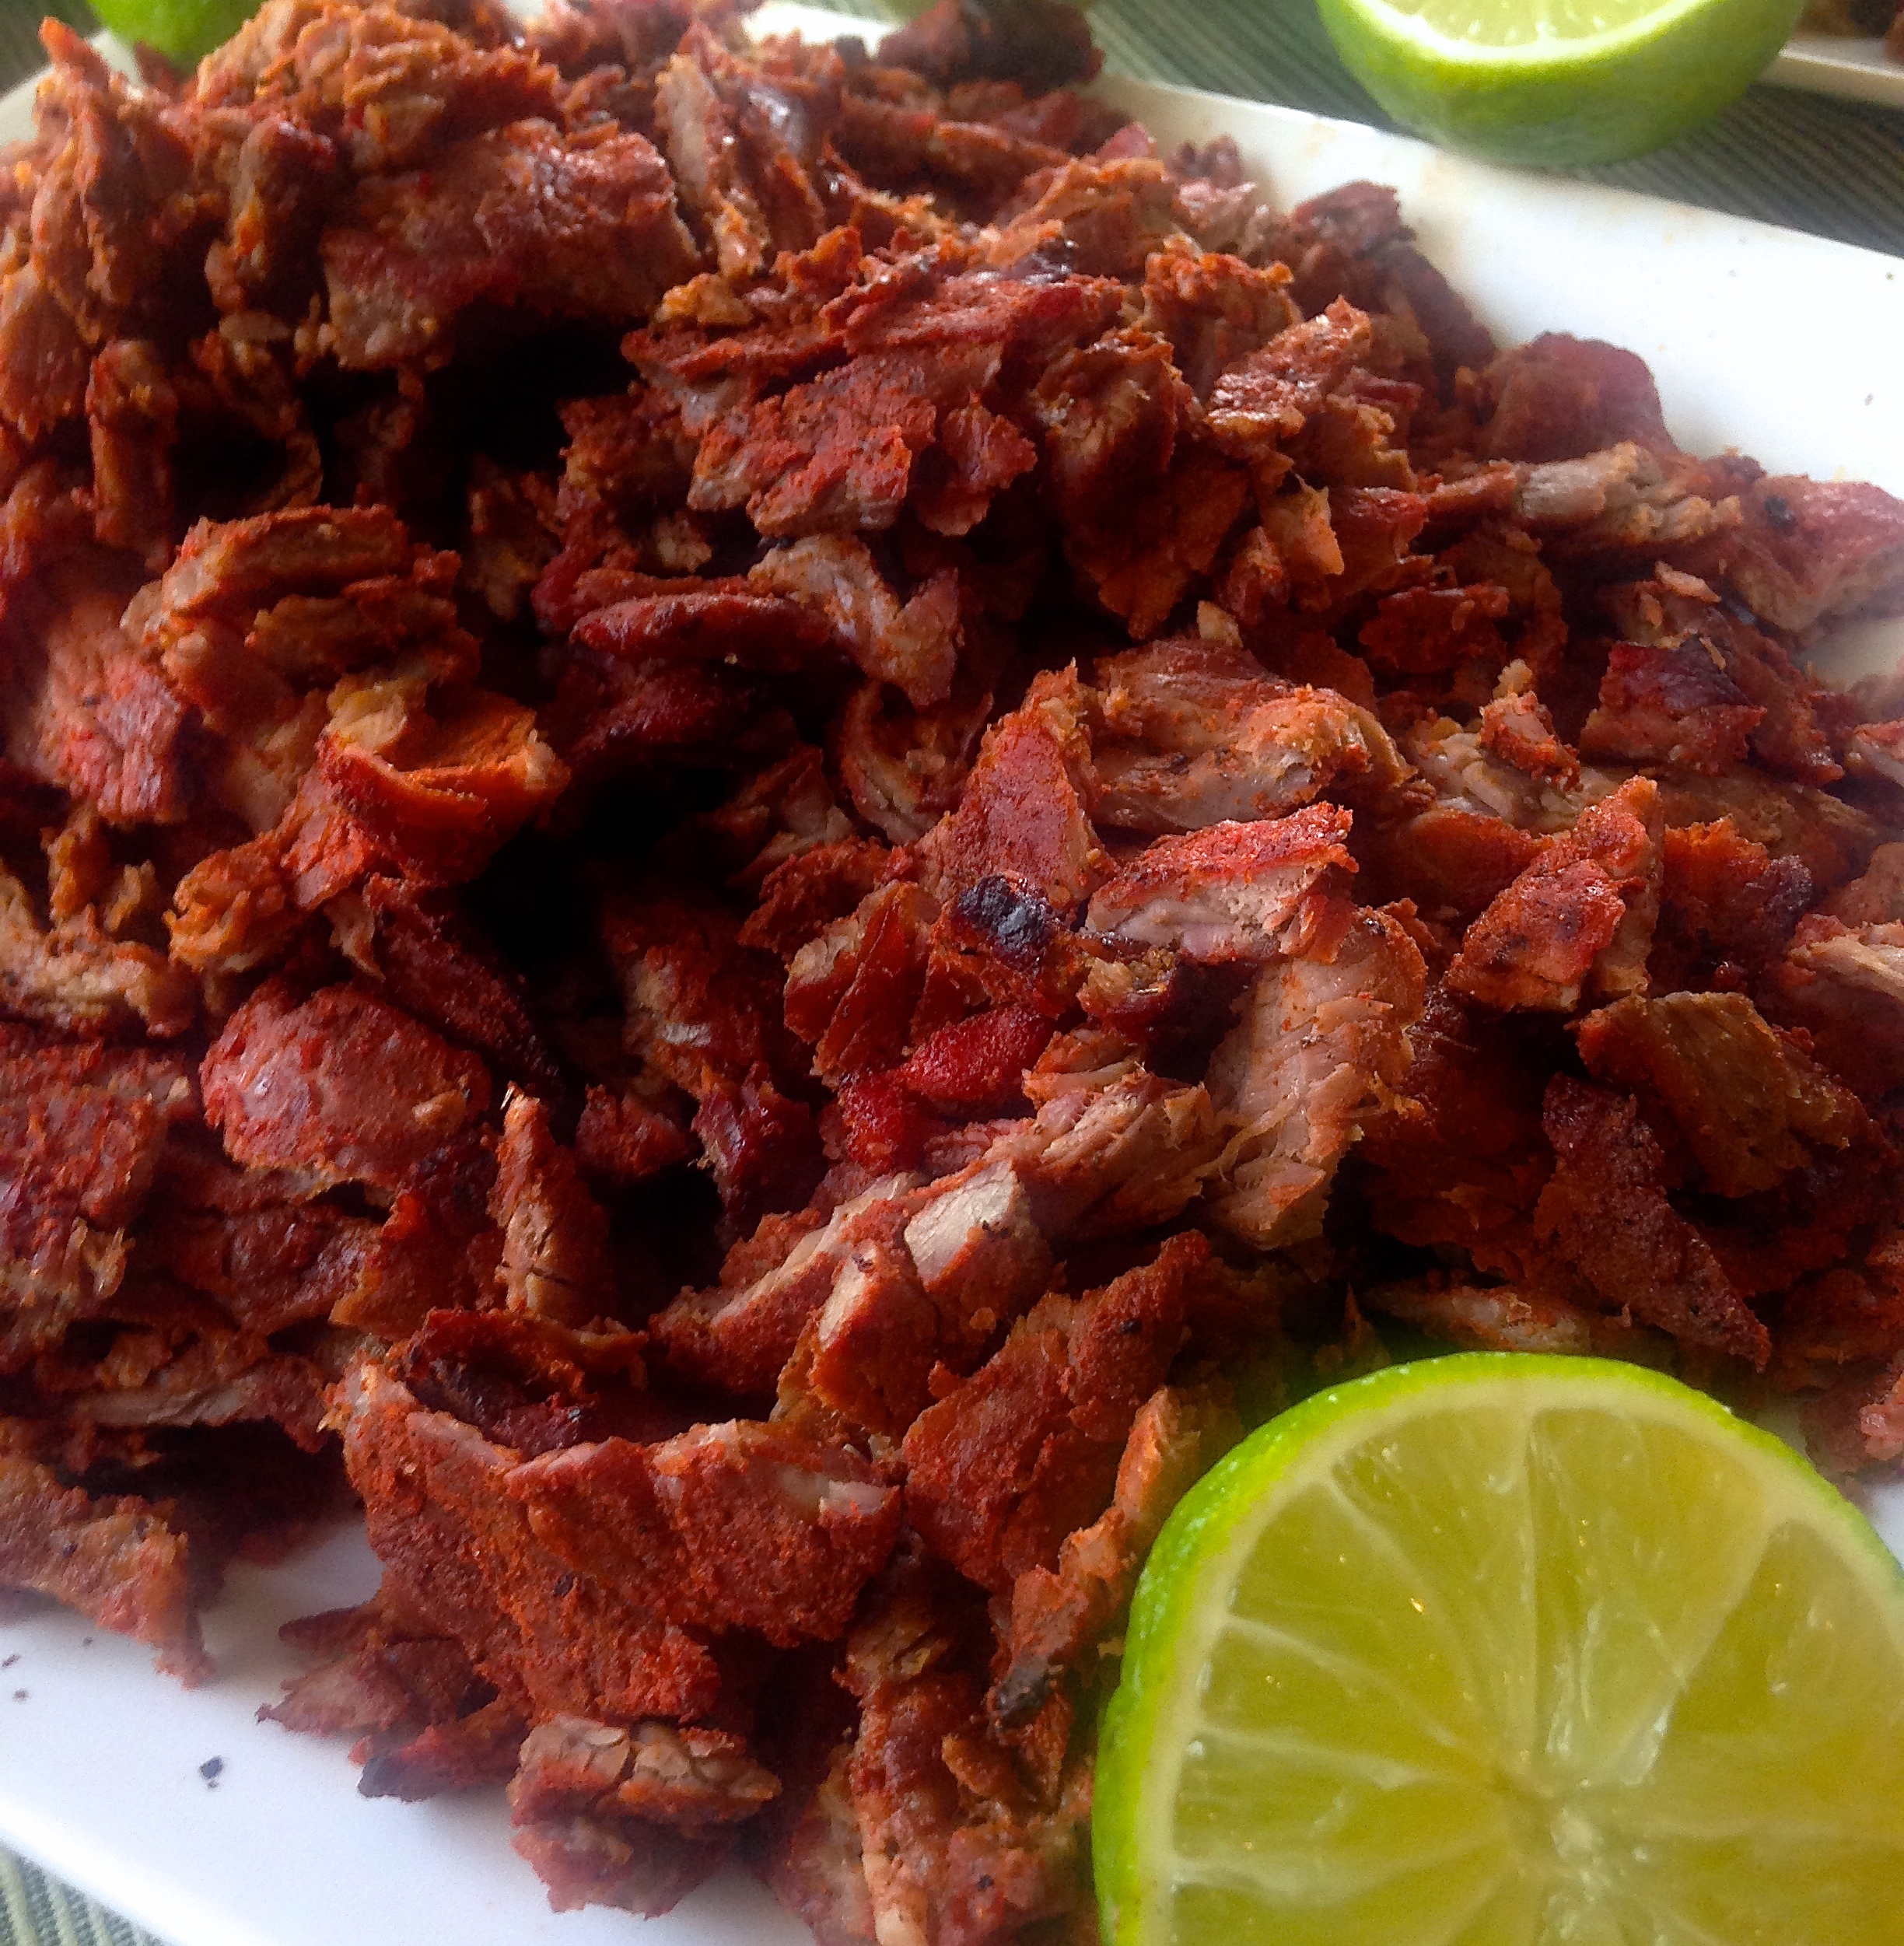
Carne Asada is seasoned flap meat, cooked nearly well done and usually served in tacos or burritos. It is best grilled. Serve it with your favorite Mexican condiments. I prepared fresh salsa, chopped avocado and a cheese called queso fresco. Sour cream, shredded cheese and jarred salsa would do just fine. Tortillas too, of course. I now owe you a post on salsas and condiments. Soon. For today we’ll focus on the meat.
Ah yes, the meat. But what is flap meat? So many questions. Flap meat is a cut found in the bottom sirloin. It’s cheap, well marbled (fatty) and very thin. Buy it in hispanic grocers by the pound. The French call it “bavette”, some South Americans call it “vacio”. I call it delicious. If you can’t find it, use skirt steak or anything you can find that is thin and flat.
Serves 6-8. Takes between 30-60 minutes.
3 pounds flap meat
10 limes
Your favorite chili powder (I used a ground New Mexico Chile with medium heat)
kosher or sea salt
oil
See? Easy as pie. Not that pie is easy. Especially if you’re preparing your own crust.
sprinkle sprinkle
Flap meat is often sold in a bag. Keep it in there for a moment and splash some olive oil on it, enough to cover most of the meat with a light layer. Shake it up, then lay it out flat on a platter or a sheet pan if available. I used foil to keep the amount of dishes down. Sprinkle a layer of salt on both sides of the meat and a layer of chili powder on one side. Repeat this on all the steaks.
Set aside. 5 minutes? Half hour? Overnight? Your call. The salt tenderizes the meat while making it delicious so you do have some incentive to wait. If you’re in a hurry, say you want to stop cooking and watch football, rush this part. No biggie.
burn fire burn
Get your fires hot. Medium high / high on a gas grill, if you’re using charcoal you’re obviously not in a hurry. Get a nice pile of coals going and have a beer. Enjoy your task. Just before you put the steaks on the grill dress with lime juice. Give them a minute. Place the steaks on the grill, add more lime juice and let them cook. You do not want your flap meat cooked to medium rare. You need to cook it so the fat and proteins start to break down. Char that side, flip, add more lime juice.
Chop up your limes into quarters and halves and heat some tortillas wrapped in foil on a less hot part of the grill. It helps to flip the tortillas like pages in a book before you heat them. You don’t want them to heat up and fuse together.
When the steaks are well done and have some burnt edges, pull them off the grill and dice them up good.
Serve with tortillas and bowls of Mexican condiments. Grab a plate. Go sit down and watch the game.
I remember the day my wife (then girlfriend) told me she wanted to stop eating meat.
I was devastated.
She was never much of a meat eater but always ate what I cooked. In those days my food was pretty standard fare. Meat. Vegetable. Starch. The occasional meatless dish usually featured pasta, and even then hopefully a sausage link or meatball or two on the side.
So I mourned. Not only for the ease of ordering and restaurant selection but for the style of cooking I had begun to develop. What would I cook? Did I now have to make two versions of everything? What about the meeeeattttt?
Now years later I (again) have my wife to thank for another transformation. These days I cook meatless more than not. I’m not talking about tofu flavored sprouts or factory made “chik’n”. I hate that stuff. I’m talking about hearty, delicious entrees that fill you up and don’t leave you lacking.
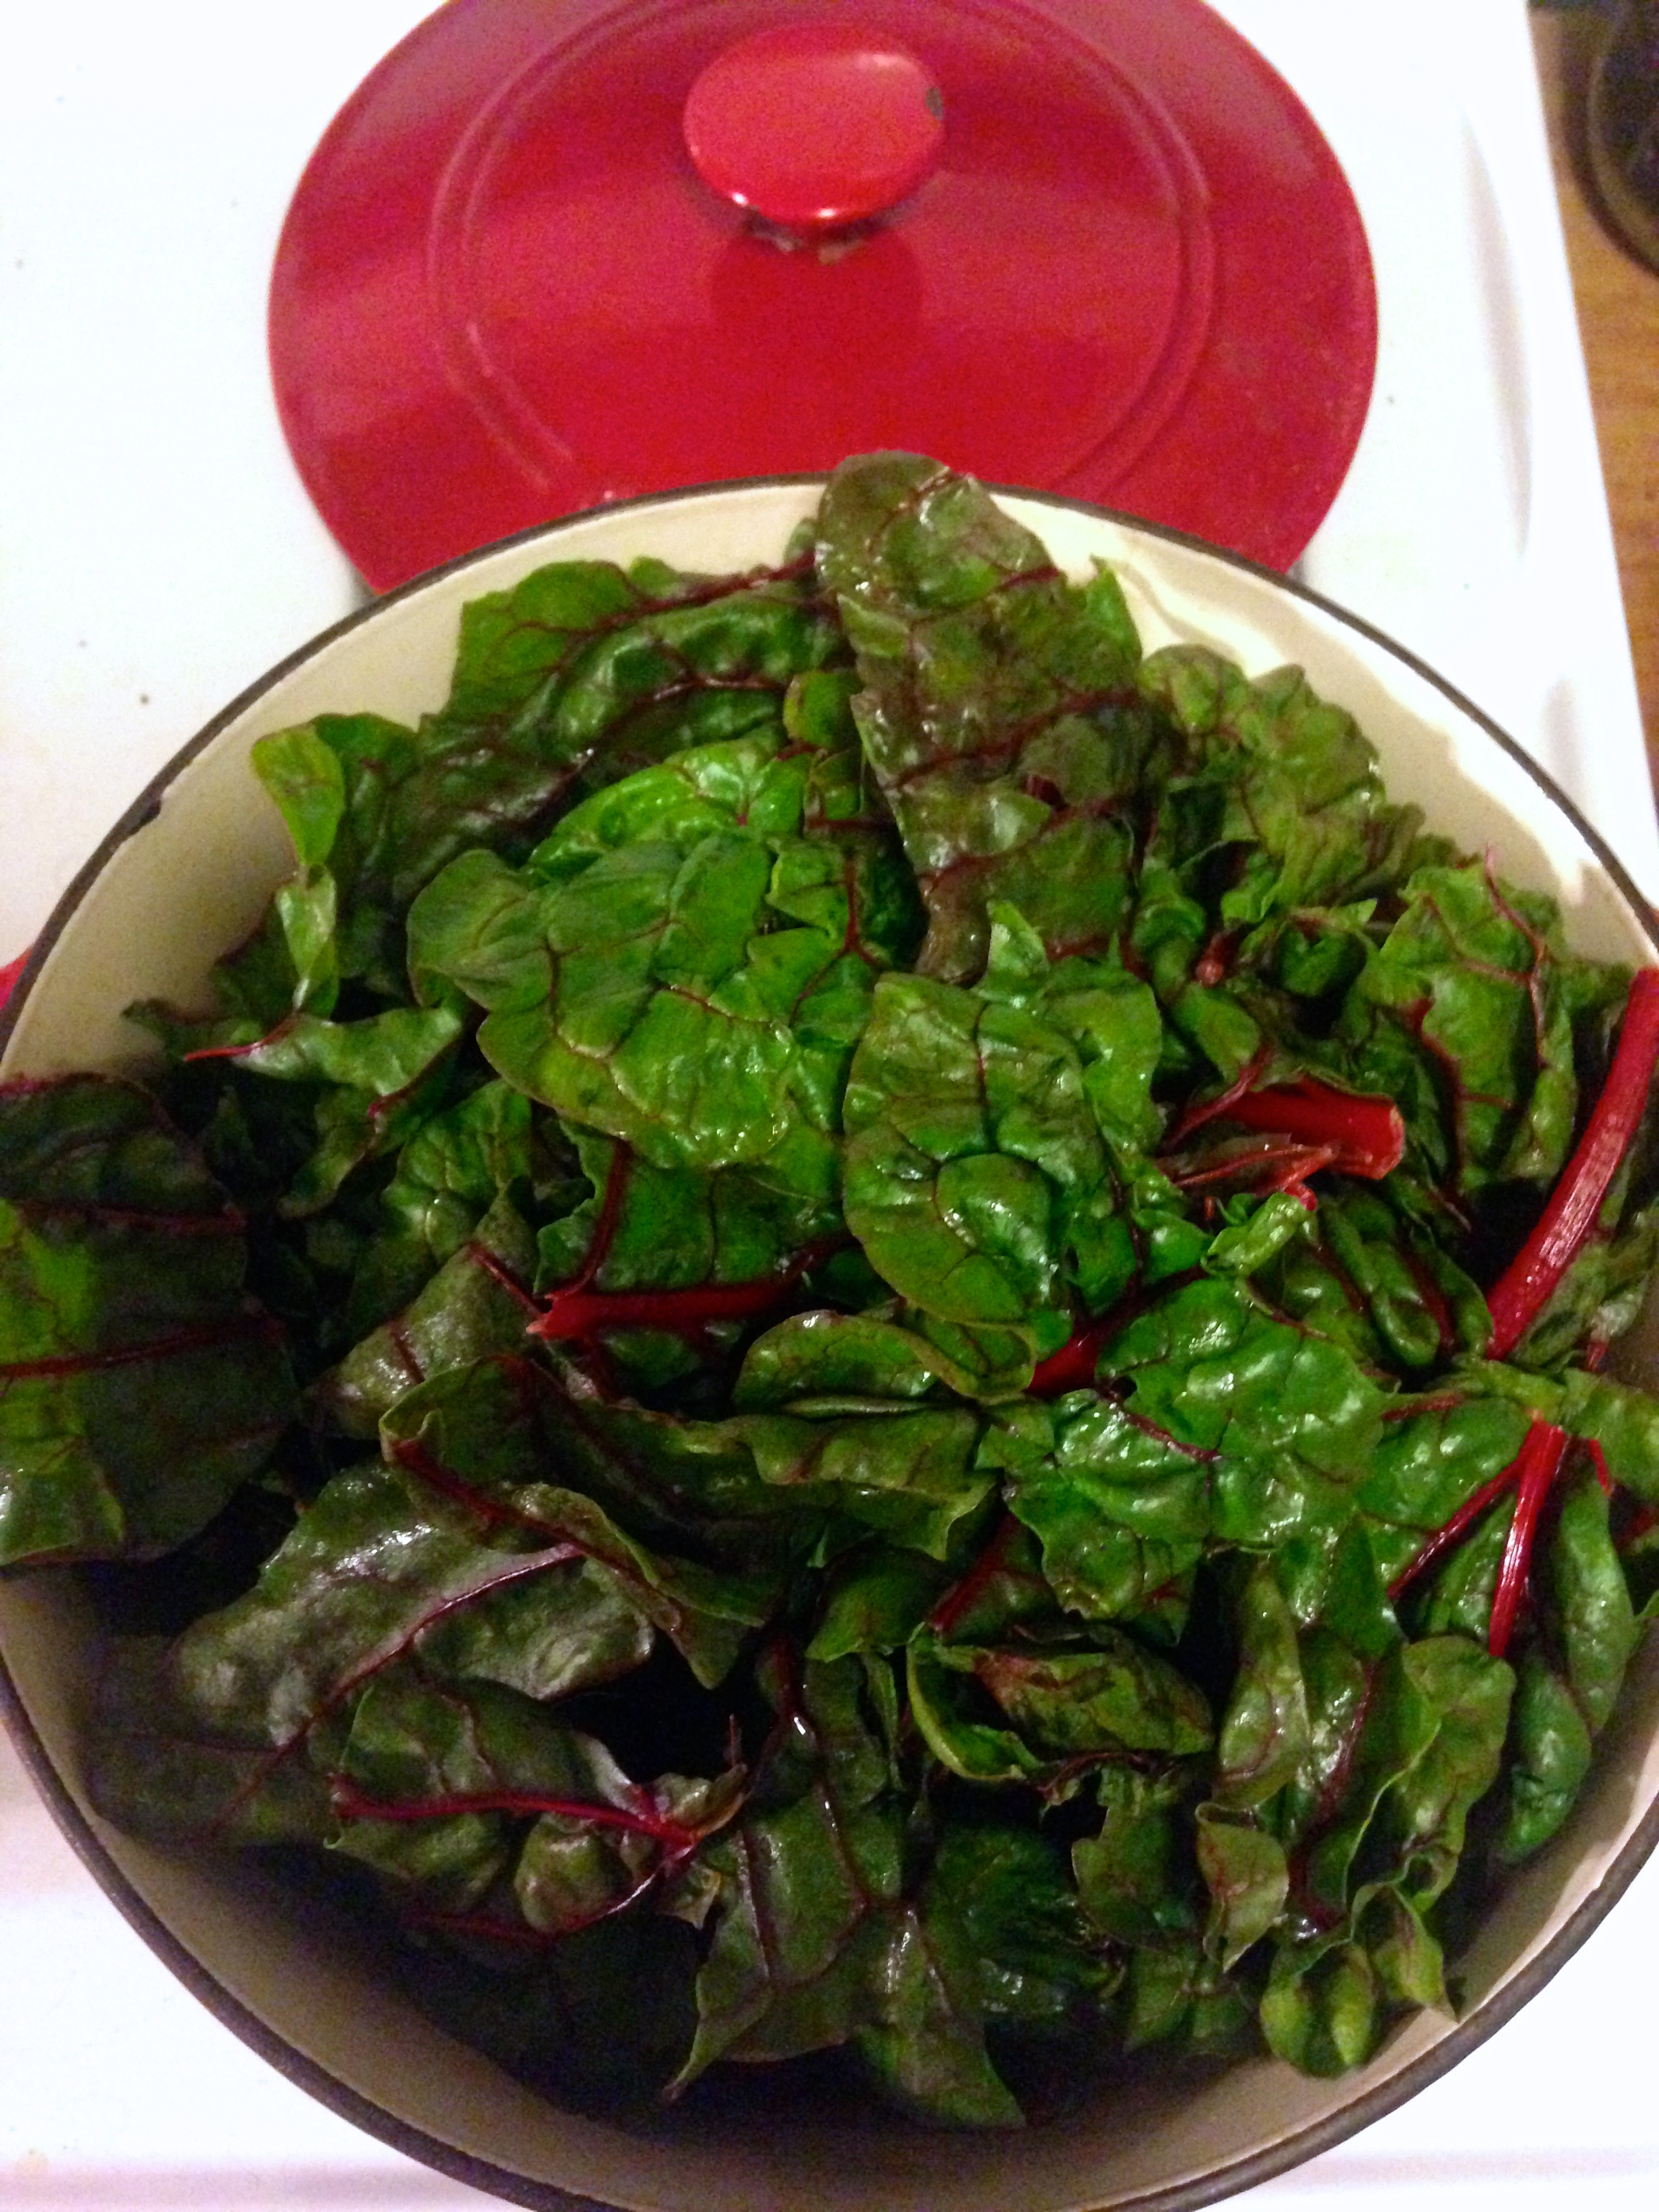
When cooking vegetarian the key is to work protein in as much as possible. This dish, with lentils, swiss chard, almonds and feta is loaded with protein and vitamins. The use of oregano, sage and fennel seeds give the lentils a very meaty flavor. Don’t feel up to a vegetarian dish tonight? Brown some sausage and add it to the mixture at the end.
Super foods unite!
1 Head of Swiss Chard
1 cup of dry lentils
4 cups (one large box) of vegetable stock
2-3 stalks of celery
2-3 carrots
1 onion
A half of a lemon’s worth of juice
2 cloves of garlic
a handful or two of almonds
feta cheese
Powdered sage
Fennel Seeds
Oregano (or Marjoram)
Bay leaf
Olive Oil
Salt
Pepper
Start by chopping up your veggies. Dice them up pretty small, especially the carrots. Heat up some olive oil on medium high and get those onions in the pot. Salt, pepper, a layer of sage, oregano and two dashes of fennel seeds. Add the celery and carrots. Shake out another layer of sage and oregano. Toss in the chopped garlic. Stir.
Smells good!
Once that has all started to work together pour your vegetable broth over the whole thing, dump in your lentils and cover. Add a bay leaf and turn the heat to medium.
Now for the swiss chard. This is a pretty robust leaf. If you bought it from a farmers market or in a bunch like me it’s quite the handful. I filled up the clean sink with cold water and broke the chard down by hand into more manageable pieces. Remove the really big stalks with scissors or a knife and work your way through it all, stopping occasionally to stir your lentils. You want them on a light boil and the cover on so you don’t reduce the liquid too much.
Run your swiss chard through a lettuce spinner. If you don’t have a lettuce spinner you’re in for some work. You should buy one anyway. Next time. Shake the leaves out by hand, press them with dish towels and accept that they’re going to have some moisture on them. No big deal.
At this point I would take the cover off of your lentils and let the liquid reduce down to about half of its original volume. Add the chard in batches, filling the pot, covering it, stirring it, covering it, repeat. You may think it can’t handle more but don’t worry it will reduce considerably. Add some more herbs. Salt and pepper again. Once you get the chard in stir occasionally while letting it cook.
Load it up!
Chop up some almonds and toss them in a small skillet on medium low heat. Let the almonds toast up with an occasional stir.
Taste the lentils. Too firm? More time. Liquid reduced too fast? Add some water. Watery? More heat, less cover, more spices. The lentils and chard are done when there is enough liquid left to be a sauce but not quite a broth. Add the lemon juice, give it a good stir and turn off the heat. Give it 5-10 minutes to cool down a bit and let the flavors calm down and mix together.
Scoop on its own or over a grain. Add the almonds and some feta cheese at the end.
The first time I had an authentic Mexican taco I’ll admit I was a little skeptical. I had recently transplanted from Massachusetts to Southern California and until that moment I had only eaten tacos sitting down, in crunchy shells and loaded with cheese. Massachusetts has a lot of great food, but Mexican cuisine is not it’s strong suit.
I stood in a line of Mexican men at a truck in a parking lot in Bakersfield, CA, using my fractured high school Spanish to navigate the menu while my friend Renee tried her hardest to convince me that these were “real tacos” and that eating from a truck in a parking lot wasn’t going to make me sick. This was 2002 mind you. Gourmet food trucks were nearly a decade from being fashionable.
So I ordered an A-Sa-da taco for $1. I looked at this mini disk of corn tortilla with steak, onion, cilantro and salsa on it and furrowed my brow a little. I took a bite.
I ordered 3 more when I was finished. By the end of the week I had returned to the truck twice more.
So yea. Mexican food is my buddy now. I eat it constantly in the spring and summer.
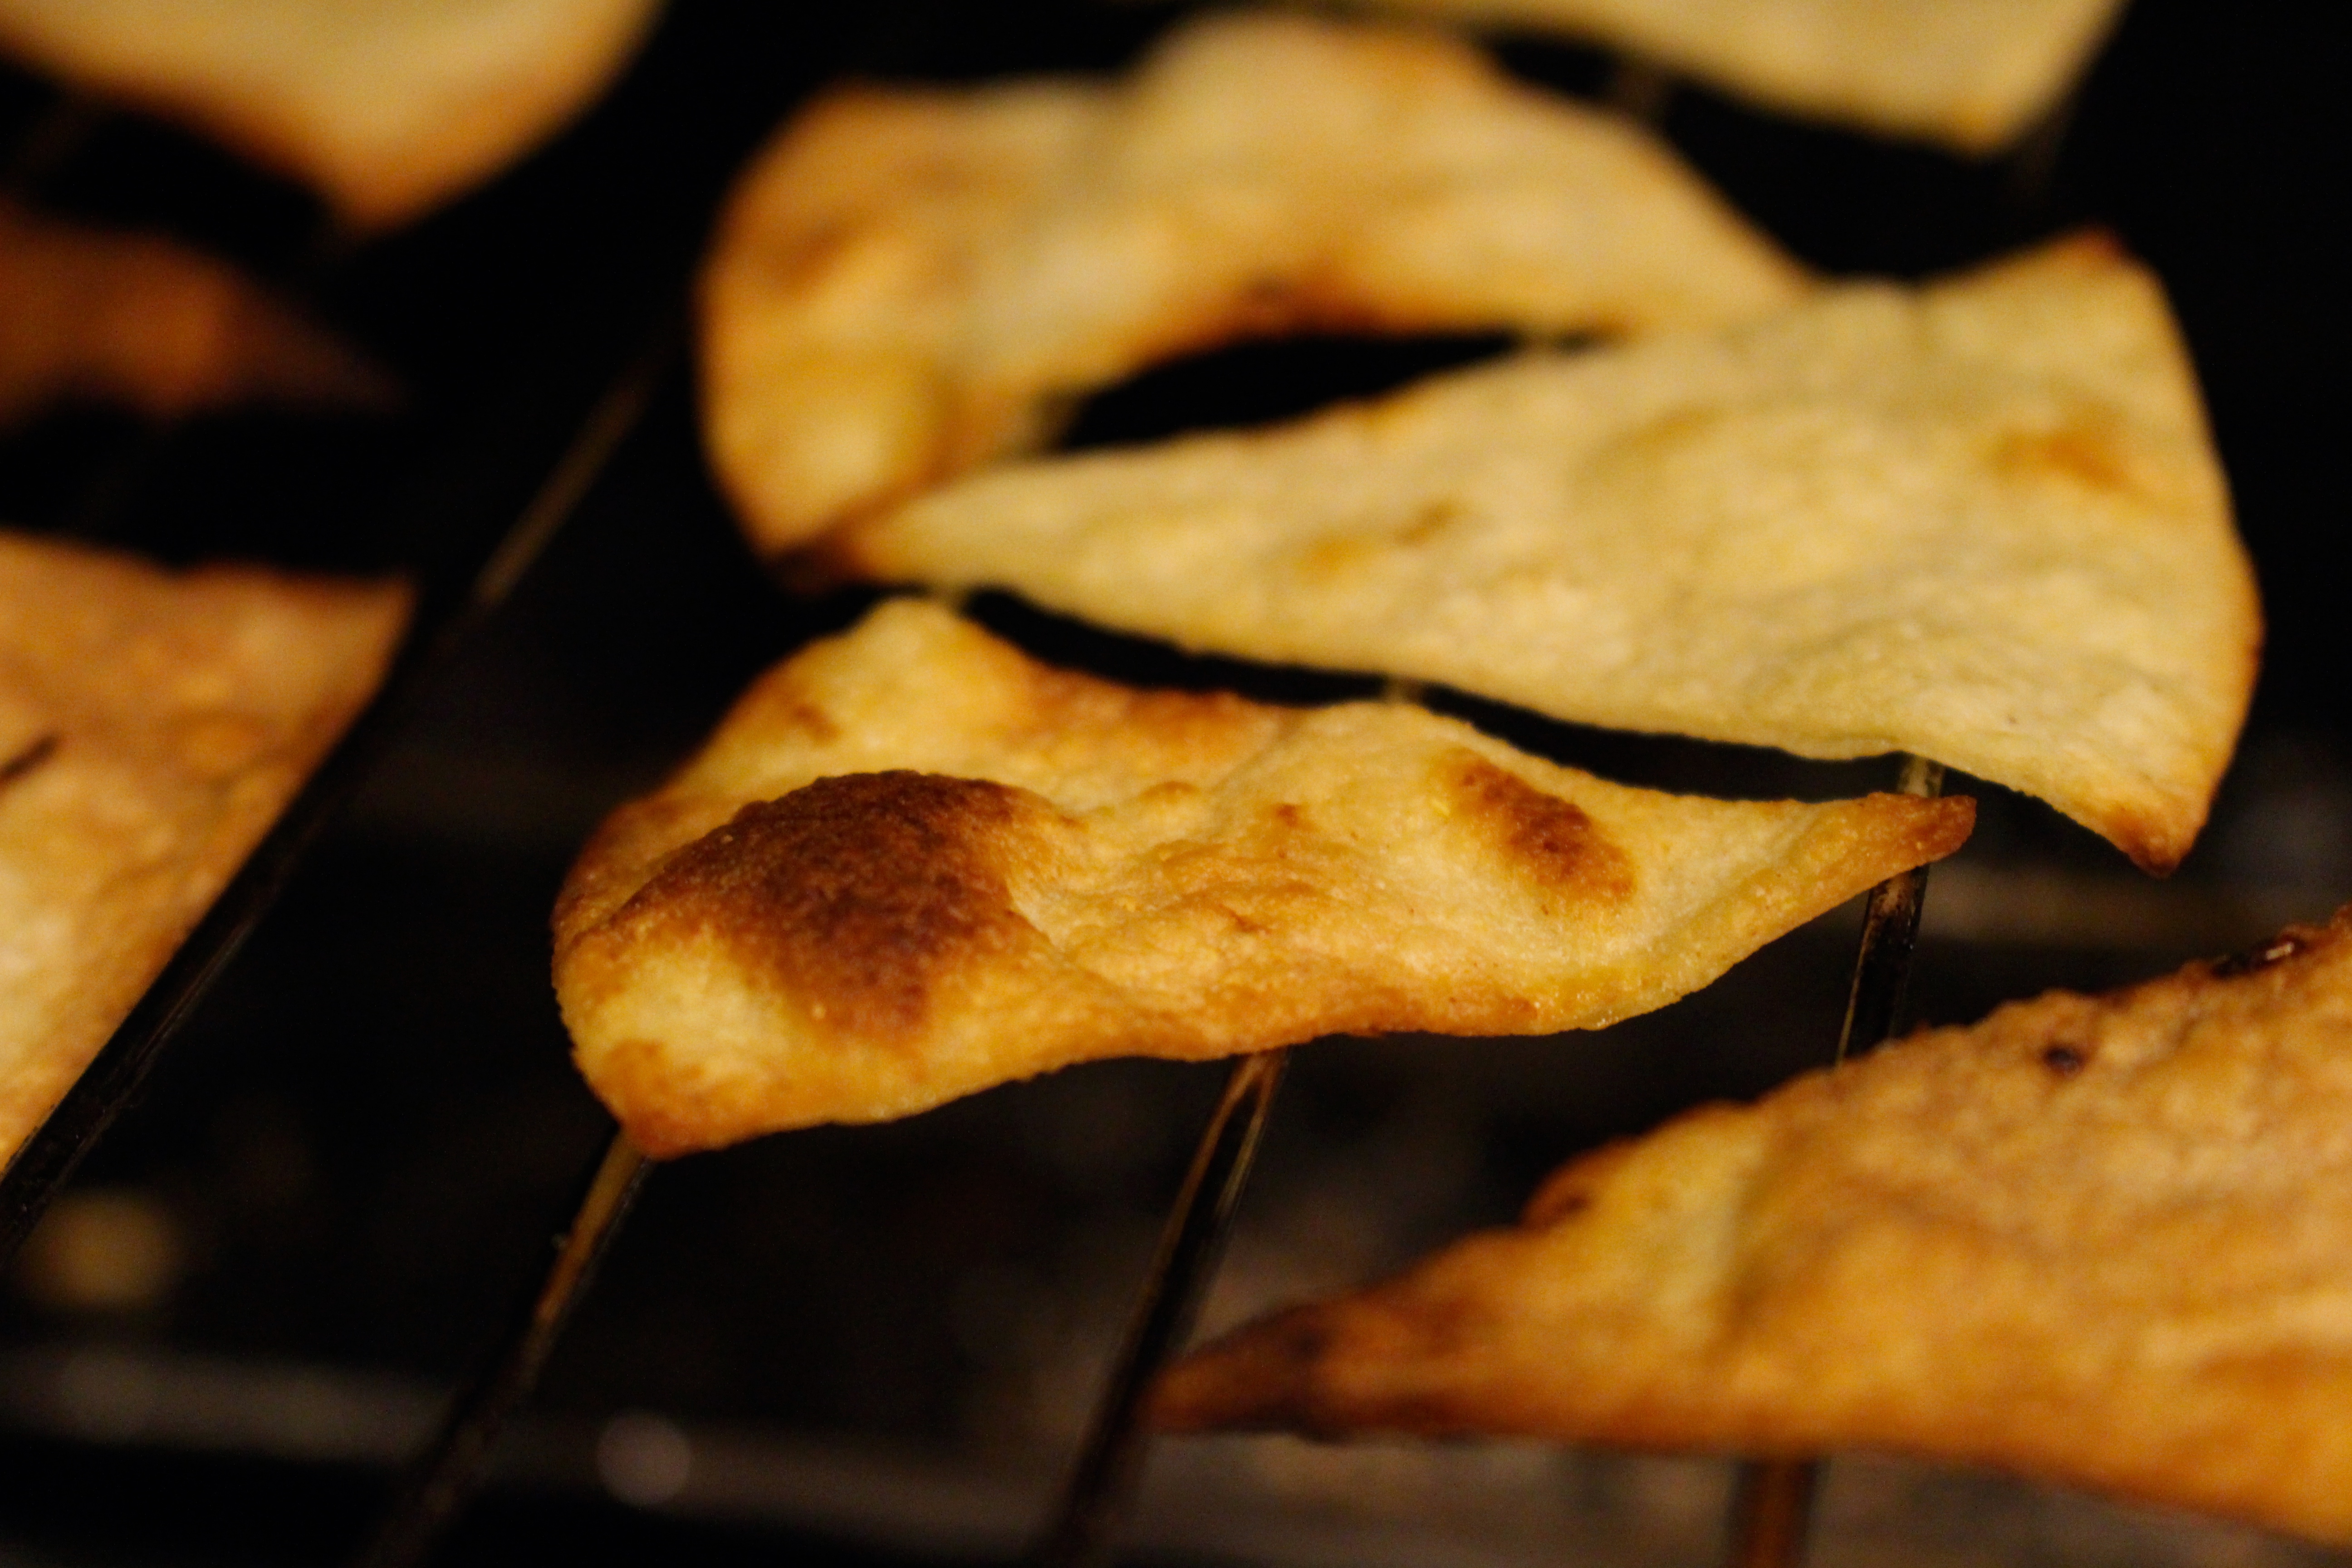
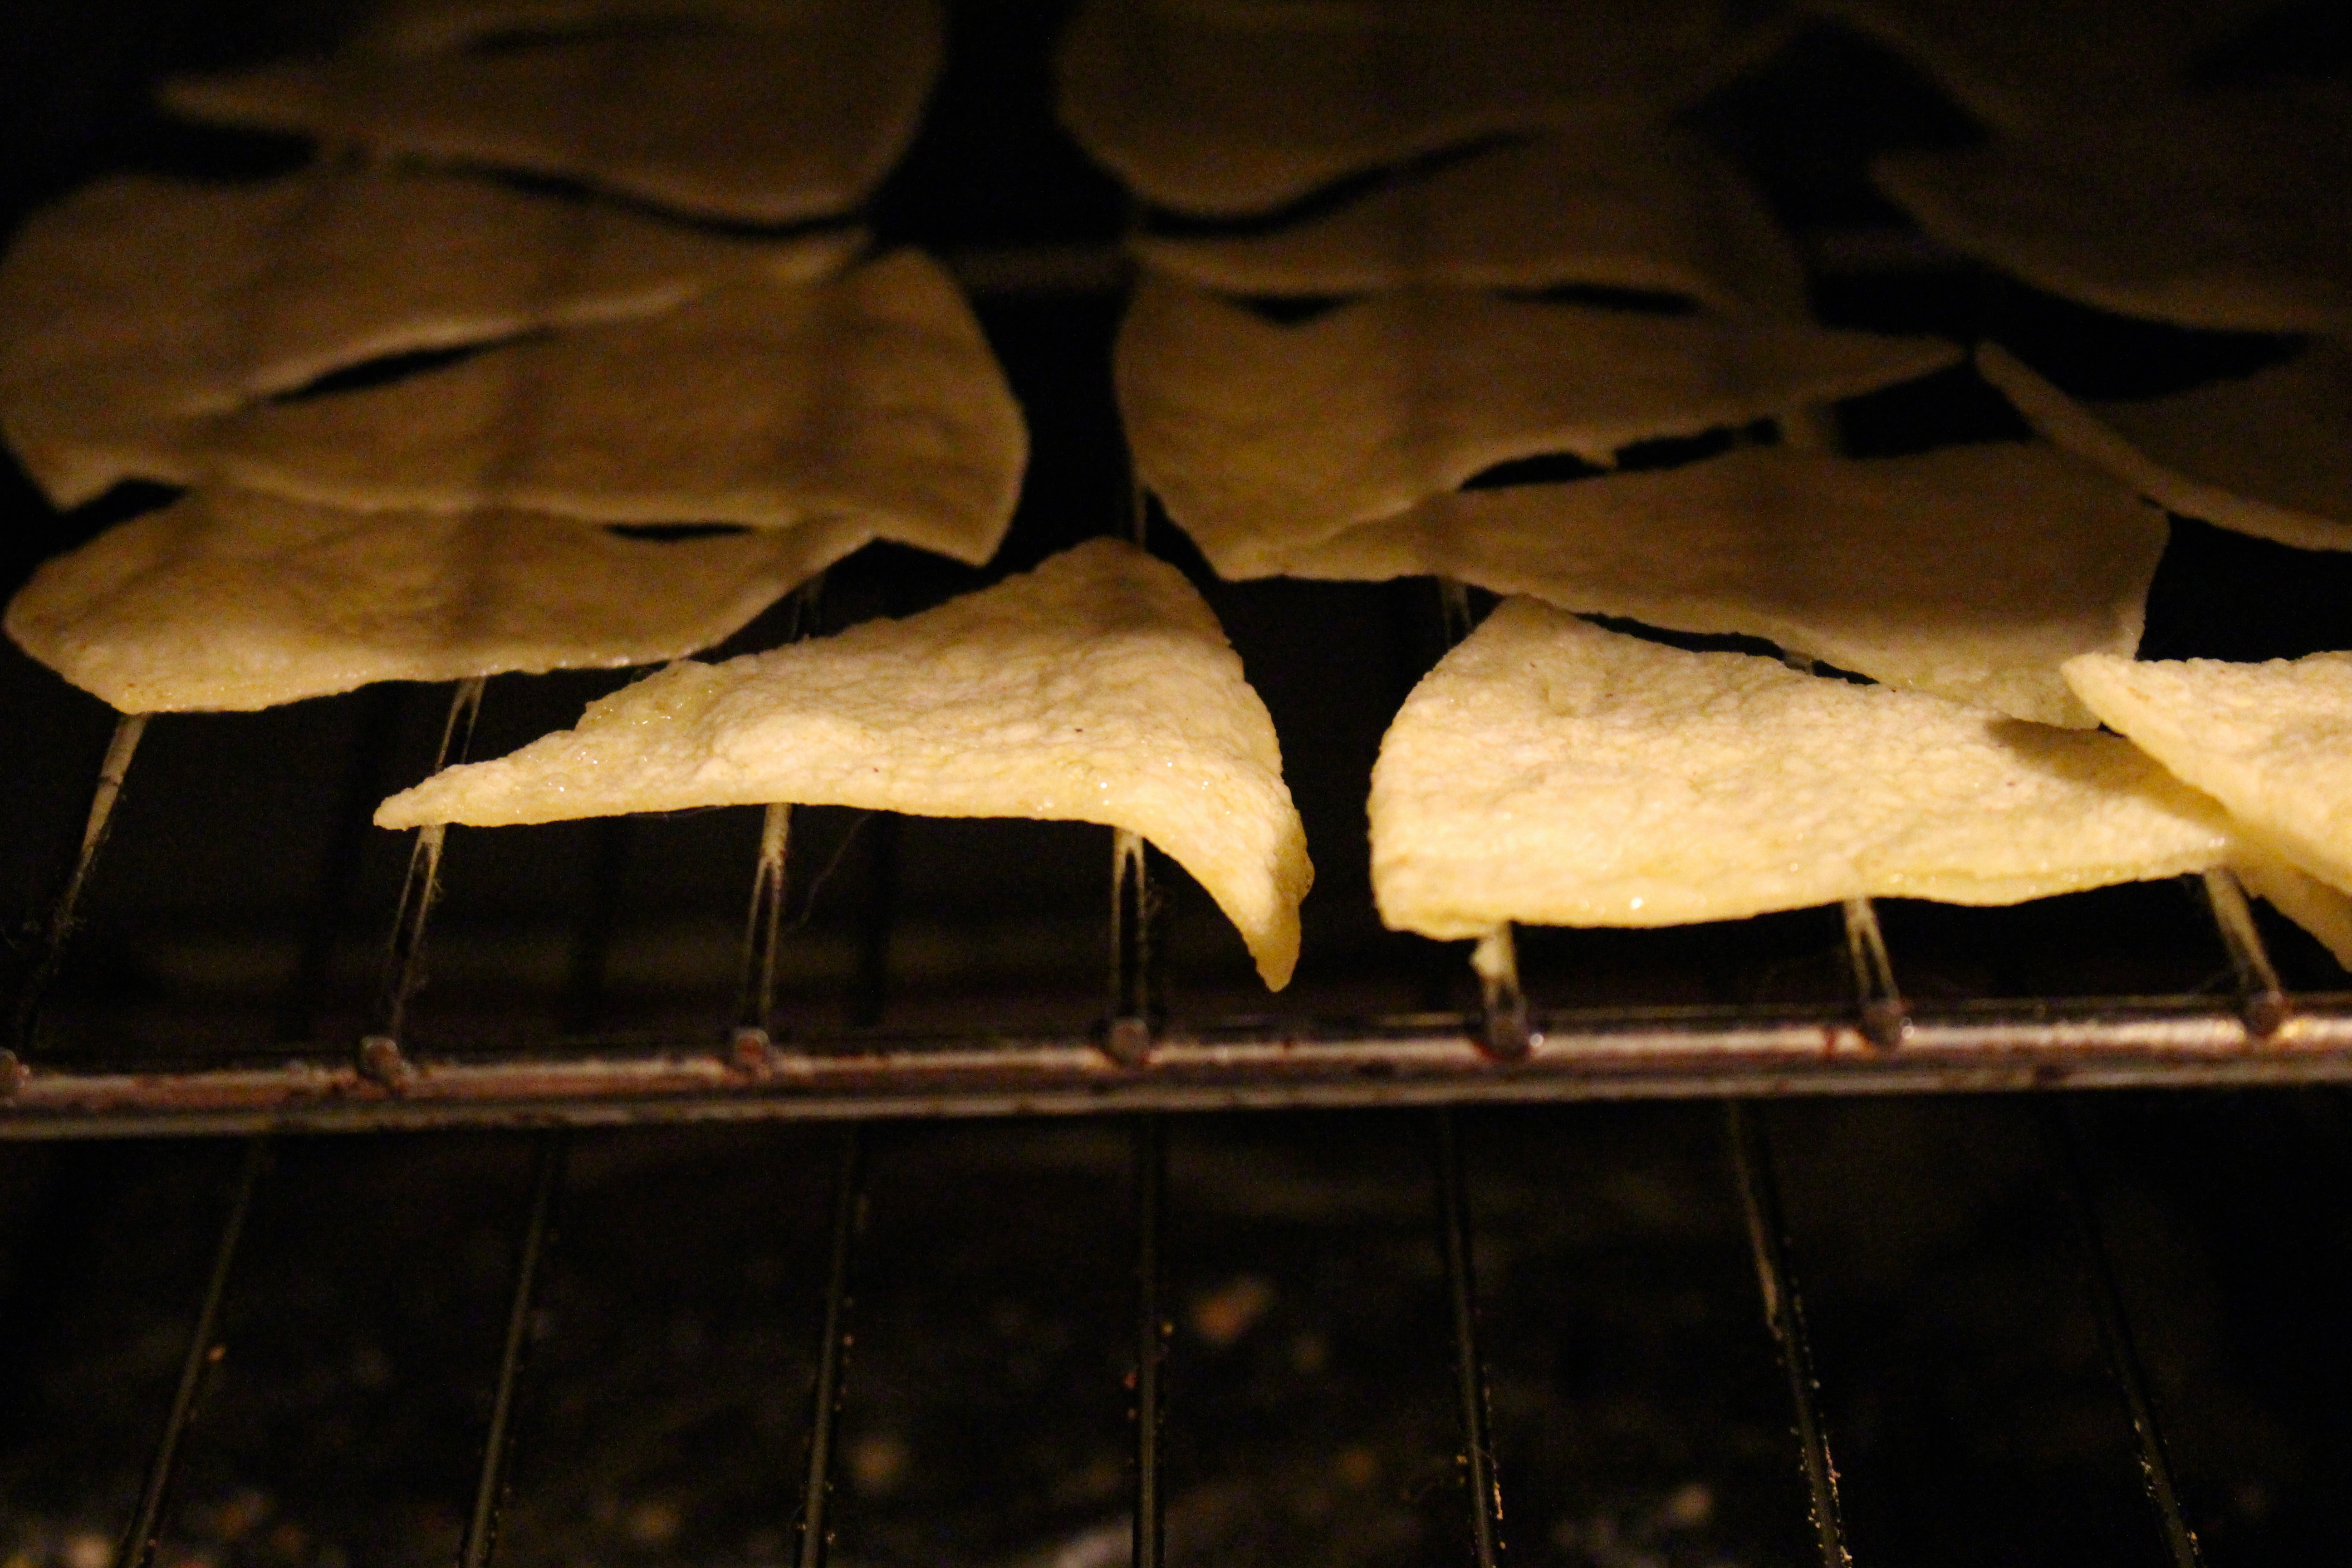
Here’s my take on healthy tortilla chips. A simple snack that tastes great and isn’t loaded with calories and fried oil.
Buy Corn Tortillas
Cut them into triangles.
Toss them in oil, sea salt and lime juice.
Toast in the toaster oven. You can broil them or bake on high heat in a conventional oven too.
Keep an eye (nose) on them, they turn quick. Maybe 3-5 minutes depending on temperature.
It’s been 4 days since the Thanksgiving feast. Our cravings for holiday fare have subsided a bit. Once bountiful supplies have dwindled and a storm has blown over the Los Angeles Basin. It’s cold, dark and wet outside. We are running our artificial lights during daylight hours. The doors and windows are shut tight, the heat has been turned on. Even the ceiling fans have been silenced. It will be days until we see 70 degrees again. These are truly the dark days of winter here in Southern California. I am left with no choice. I must make a soup to nourish my friends and family and boost morale. We will find comfort in homemade stock and thyme and rosemary. We will find inspiration in the turkey who sacrificed himself for this noble task. We will carry on.
Smells like freedom.
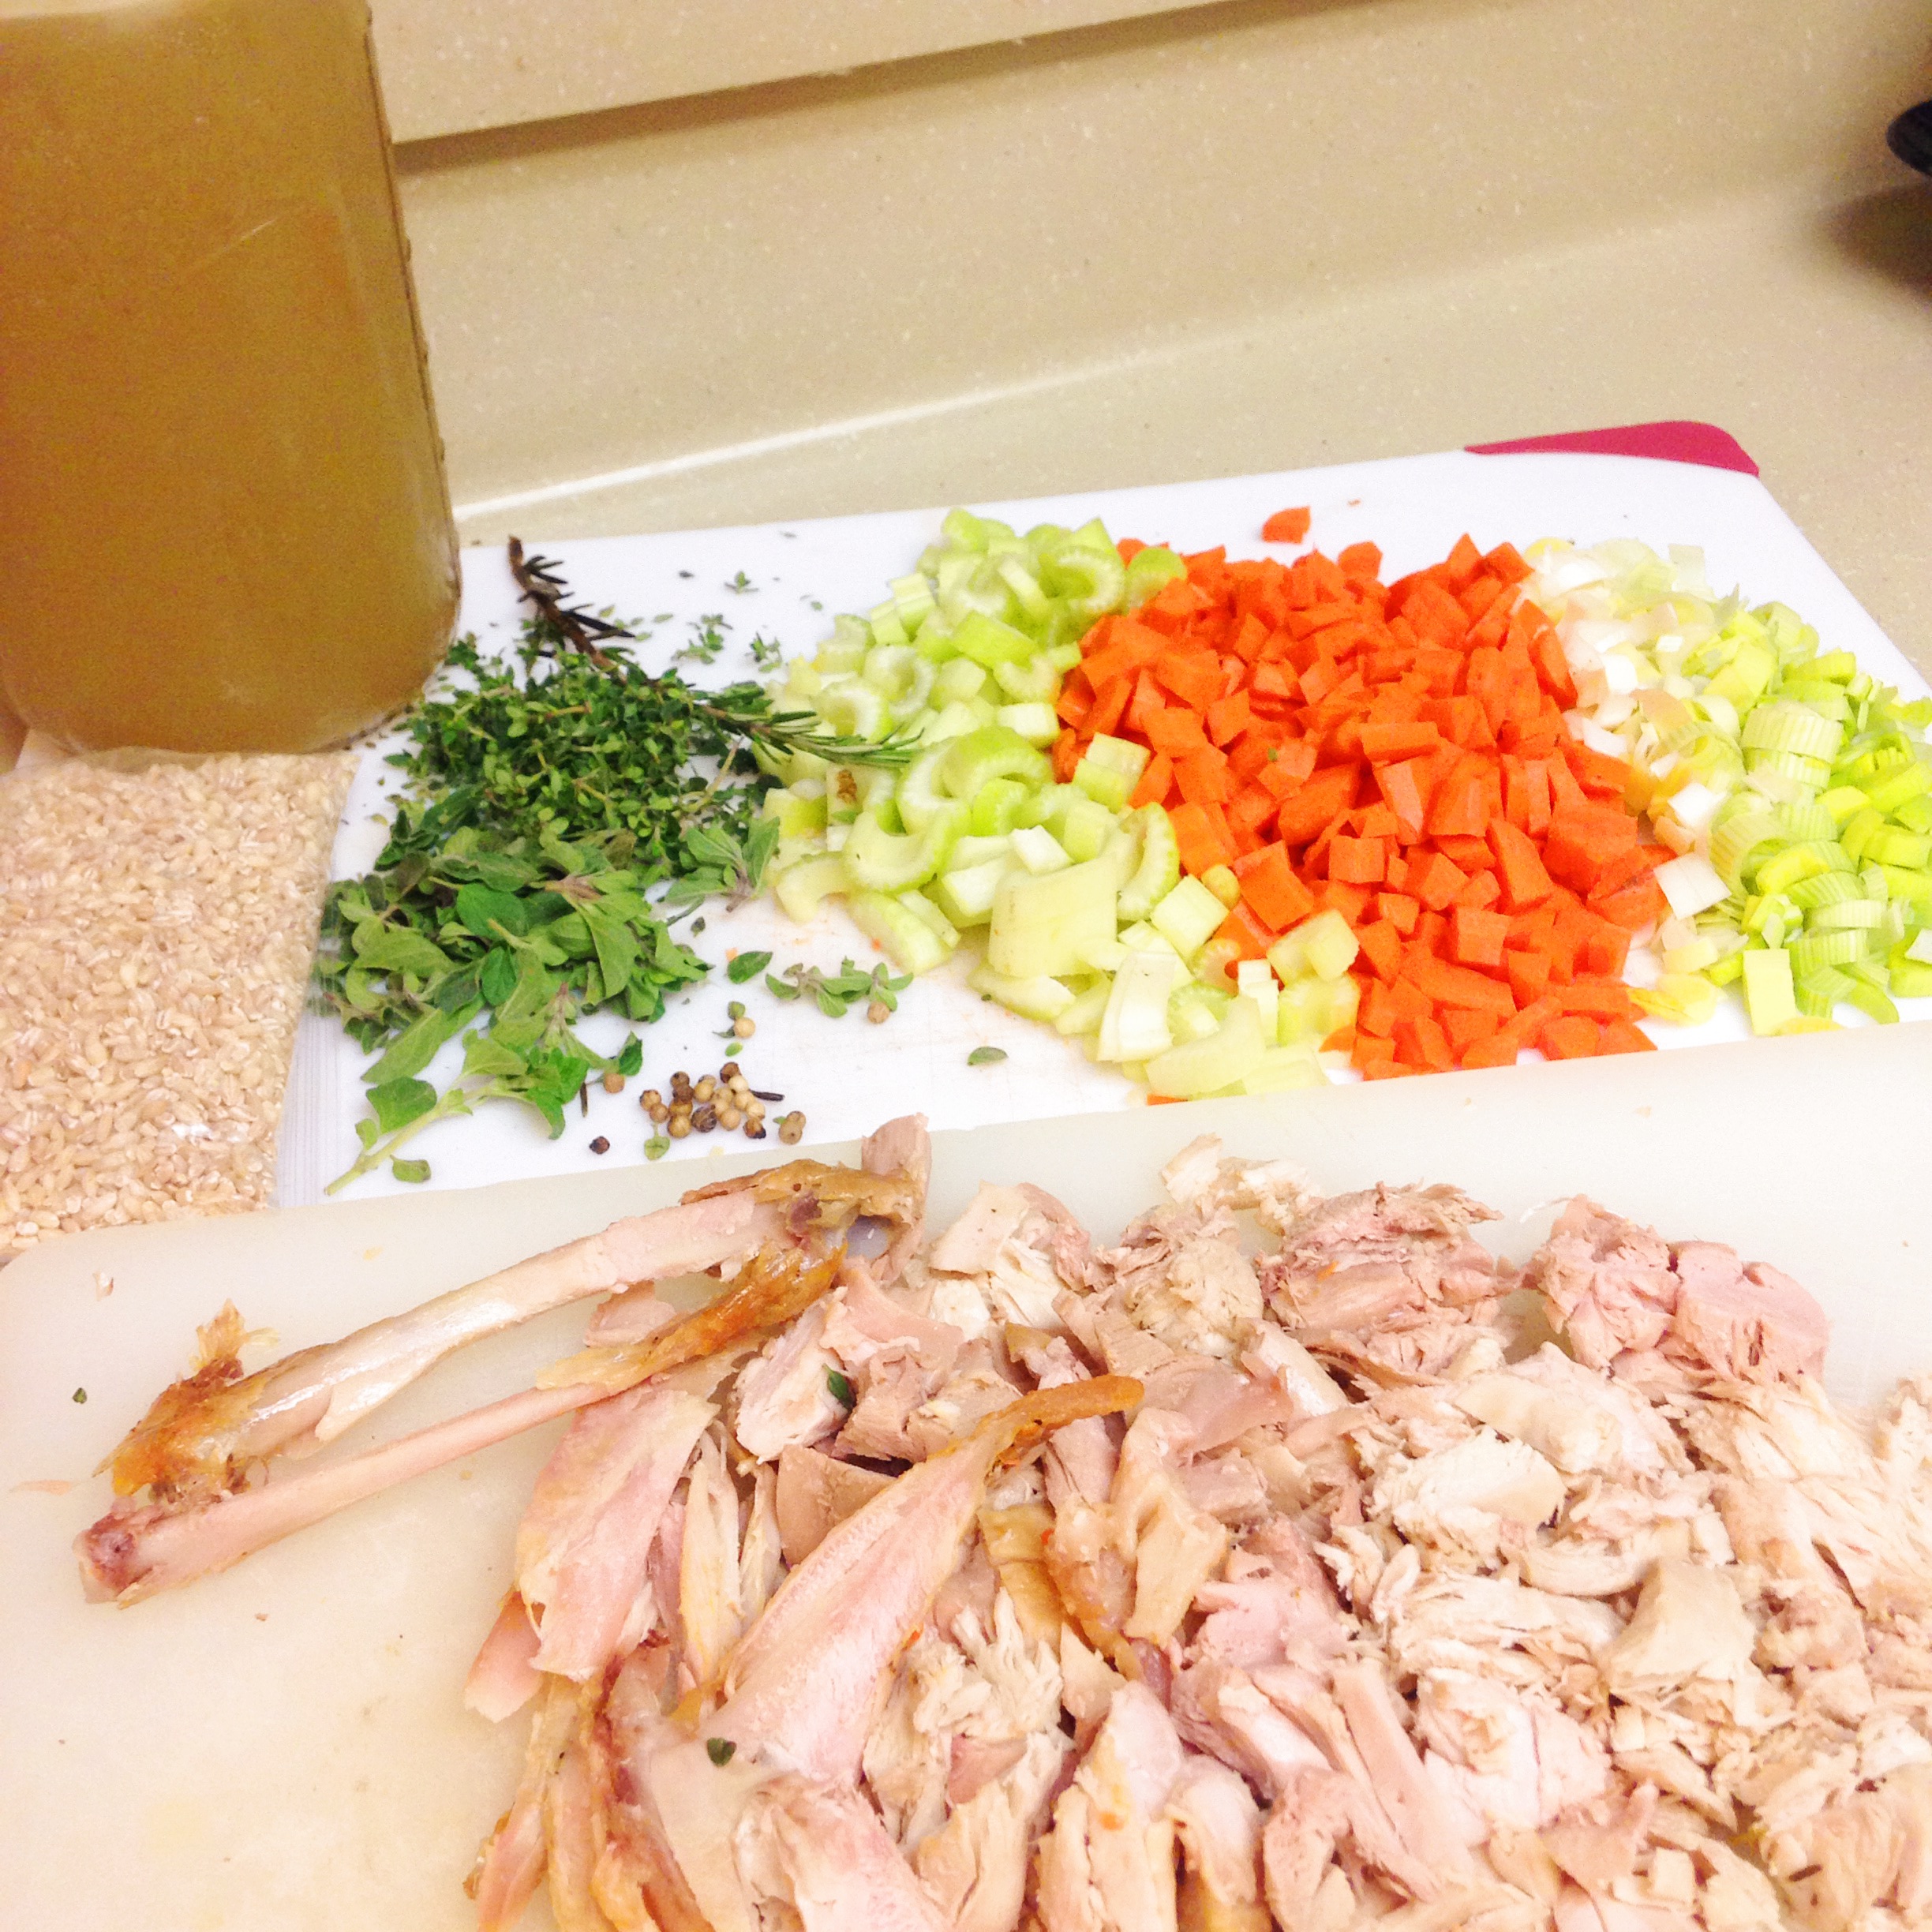
Turkey Barley Soup.
Hopefully you took the stripped down turkey carcass and boiled it in water for 2 hours last Thursday. Tell me you did. (It’s ok if you didn’t, just a missed opportunity on both of our parts) For now, let’s assume you did.
Chop the leek into thin strips and toss it into hot olive oil. Salt and pepper it. Chop up the garlic and toss add that too.
soon
Break down the carrots and celery into small uniform pieces. Big chunks work too, it just cooks faster and is easier to eat in smaller pieces. Put that all in with the onions, stir and add salt and pepper.
Give that a few minutes. Use that time to clean, organize and get your herbs out. I had a lot of fresh ones leftover from Thanksgiving so they needed to be broken down and chopped. Lots of thyme (if dry, cover the surface of the liquid in 2 layers, if fresh, use a loose handful), half as much rosemary, half of that in sage. It really it doesn’t matter much and is to your personal preference. We’re making soup. Add more as you go. It’ll be delicious.
Pour in the broth and add the herbs. Salt and pepper again. Add the turkey and barley and set on medium high heat with the cover on.
This is when I clean up the kitchen. (again) I like it tidy when I cook. It keeps things moving smoothly. By the time you’ve wiped down the counters and washed up your prep dishes the soup should be boiling. Give it 45 minutes with an occasional stir. By then things should be pretty close to done. Take the lid off and keep it on medium high for another 30 minutes. At this point you should be checking in every ten minutes or so. Have a taste. (HOT!) Does it taste like soup yet? If not give it more time. The color, smell and taste of the soup will shift when it’s done. I’m sure there is a scientific reason for it but I like to think that the separate ingredients finally yield to each other and collapse into a group hug. If you’re watching the broth you’ll be able to tell.
Right at the end I turn off the heat entirely and squeeze the half of a lemon into the whole mixture. This lets the flavors settle in and the soup cool enough for people to eat. I took a fresh baguette smeared with olive oil and broiled it in the oven for a few minute. The soup was served in mugs. Six people ate, several had seconds. Nothing was left behind.
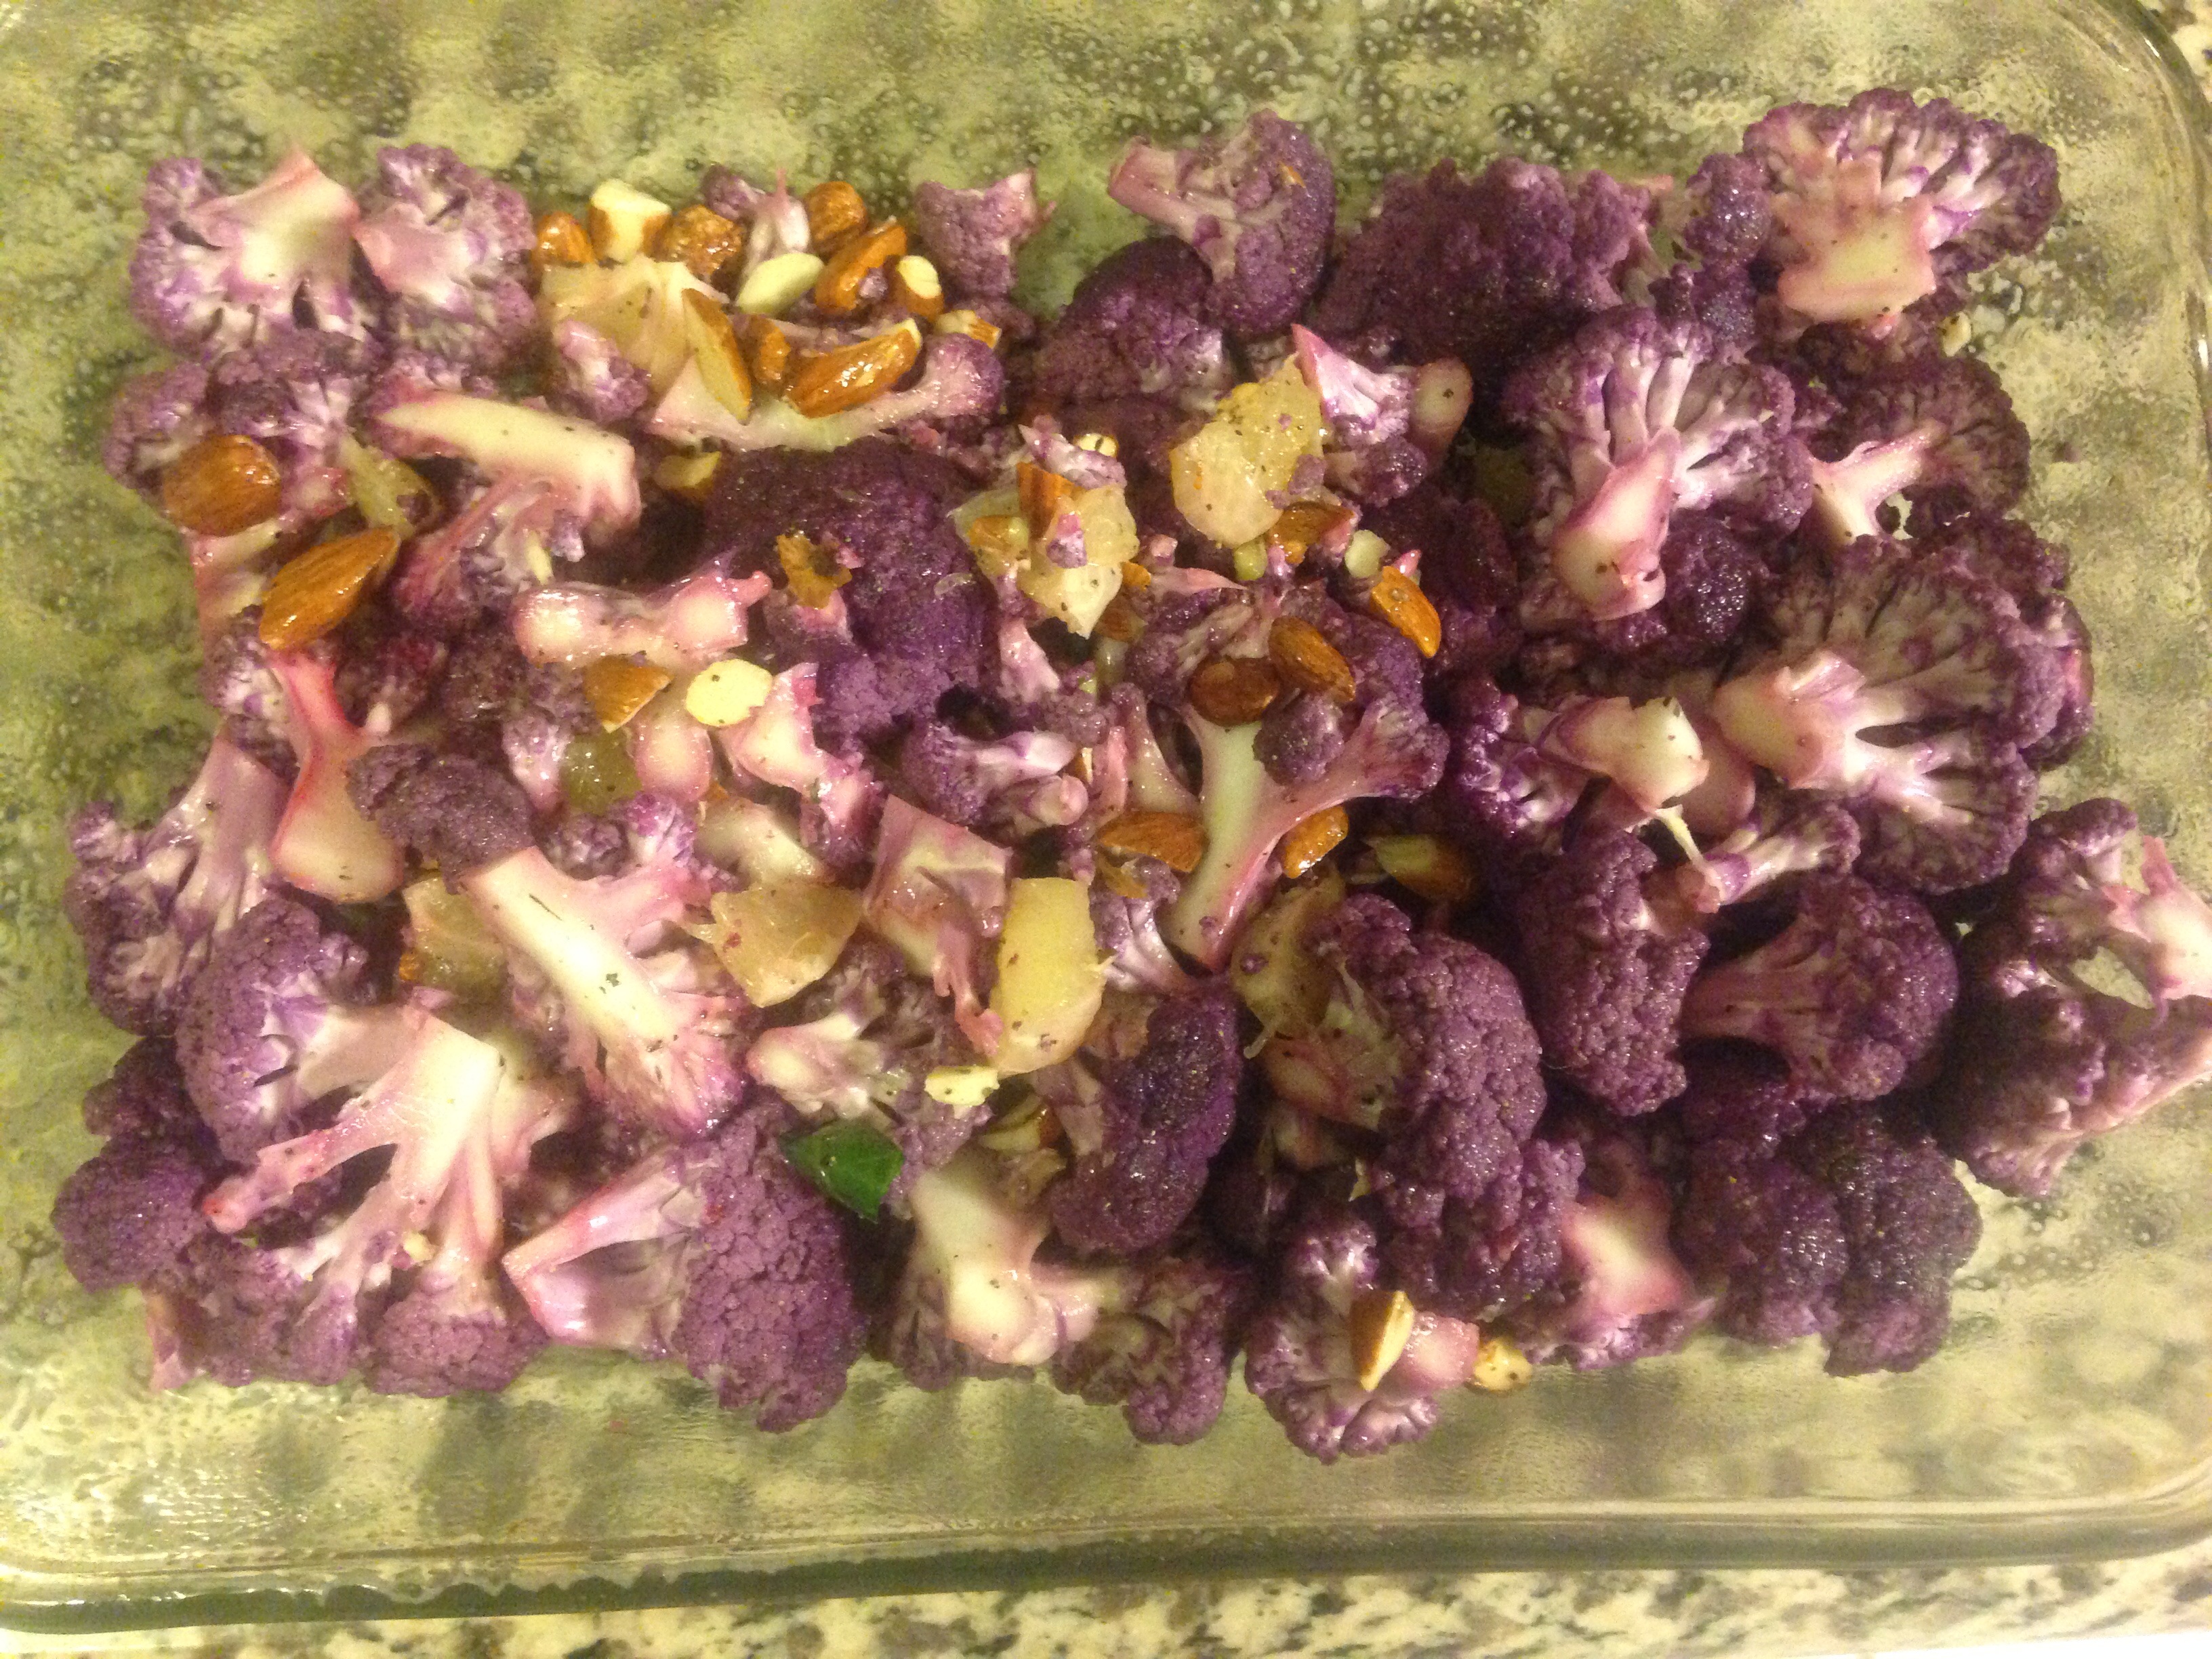
Cauliflower is such a versatile vegetable. You can grill it, steam it, roast it, purée it, sautte it, make steaks with it, soups, stocks, steaks, oh my.
Sorry. Little bit of Bubba Gump there.
Outside of the emerging vegetable movement in some innovative restaurants these days, cauliflower has been relegated to icky status. Over steamed, farty smelling cauliflower mixed in with some sorry ass carrots and onions.
No wonder so many people think they don’t like it.
Try this on for size.
One head cauliflower. (Does your store have Purple?!)
One lemon
One half handful of almonds
Sea salt
Cracked black pepper
Olive oil
Turn the oven on 425.
Break down the cauliflower into small sized pieces and toss them in a large bowl. The more uniform the chunks the better. The florets are where the money is at so focus your efforts on them. When that’s finished either set aside the stalks for vegetable stock or (sorry grandpa) throw them away. (But you can make soup with that!) I know Pepe I know. Sorry.
Roughly chop up the almonds so that they are in halves and quarters. When that’s finished skin the lemon and chop into chunks. Swirl the olive oil over the mixture a couple times and give it a layer of salt and pepper. Mix it good, get it on a baking sheet and place it in the oven. The more single layer the pile the more yummy caramelization you’ll get.
Ready for the oven!
I set a timer for 20 minutes and mix it up. Set another timer for 15 minutes and keep your eye on it. More accurately your nose. It will smell done when it’s done.
Poke a fork in a thick floret and see if it falls off. Ideally many of the tips have begun to caramelize and the stalks are just a hair al dente.
Serve and eat. Rejoice at cauliflower’s comeback.
I’m a bad blogger. All I have is this cropped photo from the main plate.
Oh my it’s mid November already. Where. Has. The. Year. Gone.
Anyways, when the days get short and the air gets that nip in it my cravings take a sharp left turn away from the grill and salad for dinner and smack dab into a pit of gravy.
Mmmm… Gravy.
Well the other day I found myself scanning the mancookgood Instagram feed and drooling over a yorkshire pudding posted by @sharonskitchenx of humbletartkitchen.com. Trouble is I’m not even sure what Yorkshire pudding tastes like and I had at least ten more hours of work in front of me. Nonetheless a seed had been planted and something had to be done.
Chicken Pot Pie floated to the surface and I spent the rest of the day considering ways I could stop at the store on the way home, crank out a pie and eat at halftime without missing too much of the game. My quest for football season food never ends. The trick is finding something delicious I can make without slaving over the fires and missing half the action.
Genius struck around 3pm and I was left without a choice.
Ingredients
1 whole roasted chicken
2 carrots
2 sticks of celery
1 leek
1 shallot
1 medium russet potato
1 lemon
1 can of chicken stock
1 sheet of puff pastry
1 handful of white flour
thyme
rosemary
2 bay leafs
salt
pepper
oil
Put the oven on 375f / 190c. Take out a sheet of puff pastry and lay it out flat to thaw.
Nice and tidy
Chop the leek, shallot, celery, potato and carrots into small chunks. Toss it into a large skillet with olive oil on medium high. Salt and pepper.
Next break done the bird. Slice of the wings first, eat one and hand the other to your friend. Do the same with the drum sticks.
Then get into the breasts, thighs and back meat. Separate from the bird and remove the skin. Eat that or set it aside. Chop all the meat into bite size pieces. At this point the onions should be pretty soft.
Add the chicken to the mixture, salt, pepper, lots of thyme, half as much rosemary and two bay leafs. (we’re in a hurry, need that extra punch of spice) Now add the chicken stock and turn the burner to high to get a boil going.
Smells like Thanksgiving
While you let the mixture reduce slice the skin off of a lemon and cube it. Throw that in there. A little brightness in an otherwise savory dish.
You can work the puff pastry a little here and roll it thinner. I left it as is. (the game was on!)
Let the liquid reduce by about half, sprinkle in a little flour a few times until the juice is almost as thick as gravy. This is to your preference, it’ll be delicious no matter what at this point.
Pour the filling into a greased pie pan. Drape the pastry over the pan and seal it around the edges. Poke a hole in the top and put in the oven.
I had a little pastry left over from the corners so I made some little chicken skin turnovers too.
Cook some of the fat off the skin in the now empty skillet, wrap it in pastry. Put it in the oven on some greased foil while the pie cooks.
Set the time for 30 minutes and go watch the game. Keep an eye on the pie for the another ten minutes until it’s the crust has browned nicely.


